
Cookie decorating supplies can feel overwhelming—especially when you are brand new to royal icing. This guide brings together the ingredients, baking tools, decorating essentials, and optional upgrades I use and recommend. I have included practical beginner options, a few worthwhile splurges, and honest notes when I have not personally tested a product.
Coming from one of my online classes? Use this page as an expanded shopping resource for the products listed in your workbook. The fastest way to find something specific is to use your browser’s search function and type the product name, such as “meringue powder” or “projector.”
A quick note before you shop
Affiliate disclosure: This post contains affiliate links. Everything underlined is a clickable link. If you purchase through one of my links or discount codes, I may earn a small commission at no additional cost to you. Thank you for supporting The Graceful Baker!
Product availability: Cookie decorating products and shop inventory can change frequently. I update this guide regularly, but an item may occasionally be unavailable or replaced with a similar option.
Start Here: The Supplies You Actually Need
You do not need every cookie decorating gadget on the internet to get started. At a minimum, I recommend:
- Basic baking equipment for making cookies
- Don’t want to bake cookies just to practice? A Notta Cookie is a reusable practice surface that lets you work on piping and royal icing techniques without baking anything.
- Ingredients for making cookies
- Ingredients for making royal icing
- One or two simple cookie cutters—or a sharp knife for hand-cut designs
- Tipless piping bags
- A scribe tool or toothpick
- Gel food coloring
- Drying method
- Sprinkles
On This Page
- Shopping Shortcuts and Discount Codes
- Ingredients for Cookies and Royal Icing
- Basic Baking Supplies
- Cookie Decorating Essentials
- Advanced cookie decorating tools
- Packaging and cookie business supplies
- Favorite specialty supply shops
- Shopping options outside the United States
Shopping Shortcuts and Discount Codes
Prefer to browse by shop? These are the retailers I use most often:
- My Amazon storefront — All of my current Amazon favorites in one place.
- Borderlands Bakery
- Brighton Cutters
- Chua Cookie — Use code Chua15Grace23 for 15% off.
- The Sugar Art
- Sugar Love Baking Supplies — Canada-based shop. Use code GRACE15 for 15% off.
- Cakers Warehouse — Australia-based cookie and cake decorating shop.
- The Cake Decorating Company — United Kingdom-based cookie and cake decorating shop.
Ingredients for Cookies and Royal Icing
Cookie Ingredients
Start with my no-spread sugar cookie recipe.
The basic ingredients are:
- All-purpose Flour
- Butter
- Granulated Sugar
- Corn Starch
- Salt
- Eggs
- Vanilla Bean Paste — Vanilla is the one baking ingredient I consistently splurge on.
Royal Icing Ingredients
See this post for my royal icing recipe.
You will need:
- Powdered Sugar — Outside of the United States? Look for icing sugar that contains cornstarch.
- Bottled Lemon Juice — Do not substitute fresh lemon juice in my recipe.
- Meringue powder — The specialty ingredient that helps royal icing dry hard and perform consistently. See section below.
Meringue Powder Recommendations
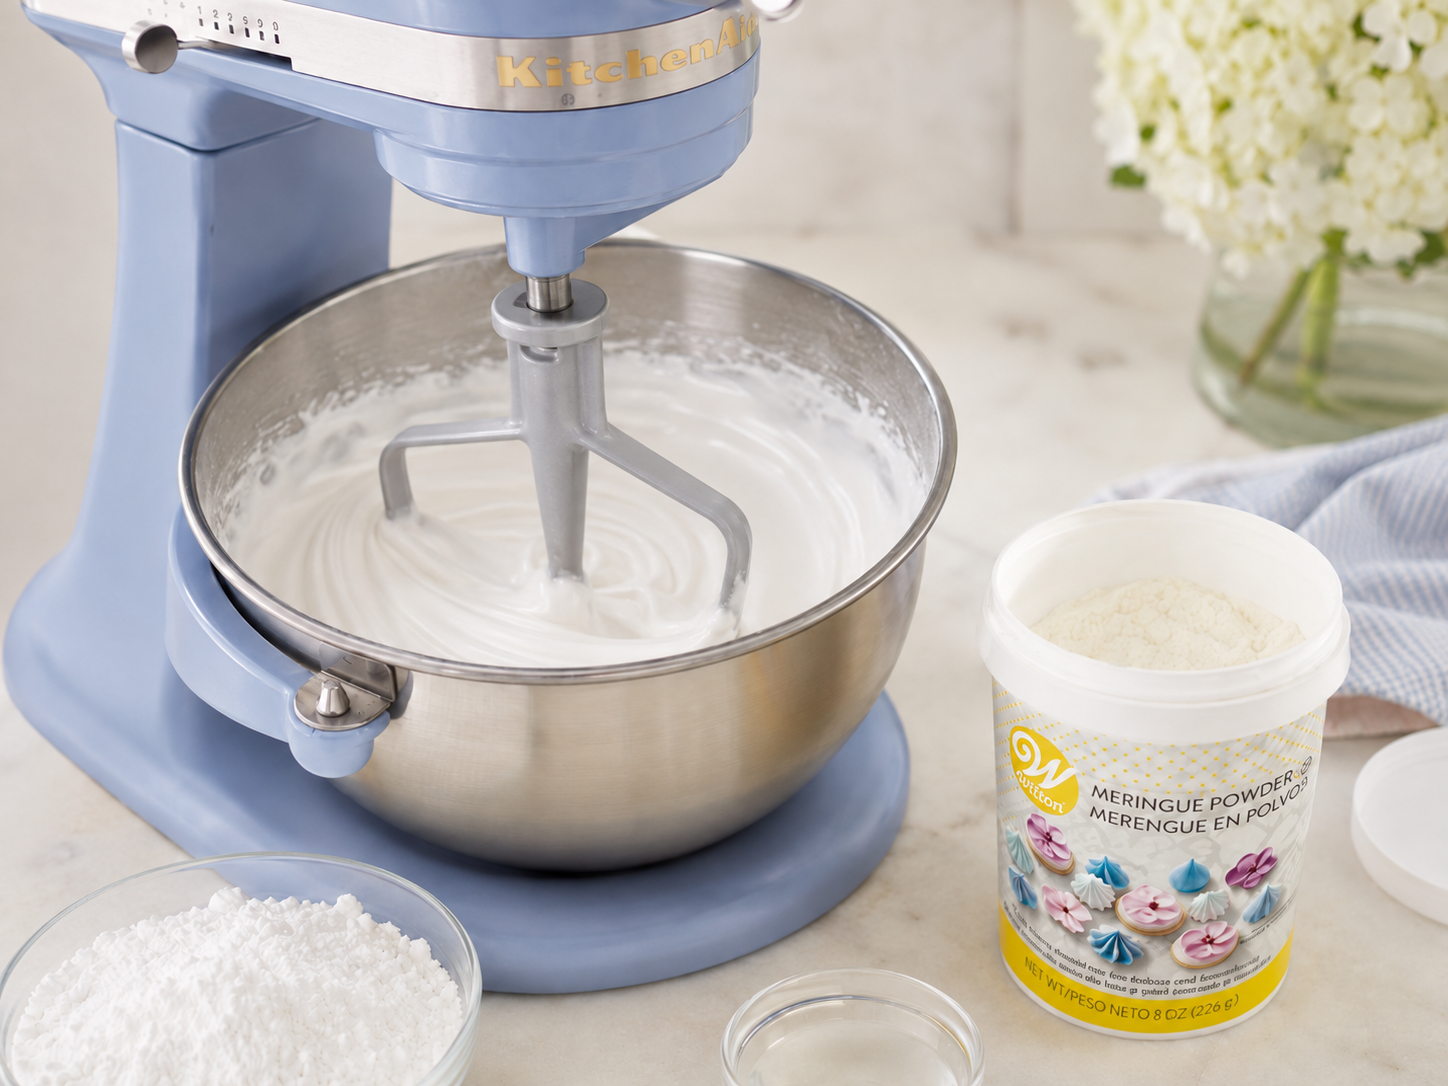
Meringue powder quality matters. A lower-quality product can clump, bleed color, or dry unpredictably. These are the brands I recommend most:
- Reliable classic: Wilton meringue powder — My reliable favorite for more than 10 years.
- Wilton listing — Amazon
- Wilton listing — Walmart
- Wilton direct
- Top pick: Genie's Dream meringue powder — My newer favorite and one of the highest-quality options.
- Genie's Dream from The Cookie Countess — A small-business source for the same product.
- Canada option: Fluffy Puppy meringue powder 6oz. and 400g bag — A Canada-based option from Sugar Love Baking Supplies. I have not personally tested it.
- Chefmaster meringue powder — Another reputable option, although some decorators prefer the older formula.
Other Meringue Powder Brands
- Modern Mountain: Works in a pinch, but I experienced color bleed when testing it.
- Judee’s: The brand offers powdered egg whites and a royal icing mix rather than a traditional meringue powder. I do not personally recommend mixes.
- Satin Ice: I have not personally tested this brand.
What If You Cannot Find Meringue Powder?
Meringue powder is one of the less common royal icing ingredients, and it may not be available at a local grocery store. It can also be difficult to find in some countries or temporarily unavailable online.
Royal icing needs an egg-white product—or an alternative such as aquafaba—to dry and harden properly. Traditional royal icing was made with pasteurized egg whites, while many decorators now use meringue powder because it is shelf-stable and tends to produce more consistent results. Meringue powder typically contains dried egg whites, sugar, cornstarch, and stabilizing ingredients.
If you cannot access meringue powder, there are a few alternatives to consider.
Powdered Egg Whites
Some decorators use powdered egg whites as a 1:1 substitute for meringue powder. However, I did not have success when I tested this method. The powdered egg whites clumped badly after I added the liquid, and I was unable to mix the icing properly.
Because of that experience, powdered egg whites are not a substitute I personally recommend.
Pasteurized Egg Whites
Pasteurized egg whites can be used to make royal icing and are closer to the way royal icing was traditionally prepared. I have not personally tested this method, so I recommend following a recipe specifically developed for pasteurized egg whites rather than substituting them directly into my meringue powder recipe.
Egg-Free or Vegan Royal Icing
For an egg-free option, aquafaba—the liquid from a can of chickpeas—can be used to make vegan royal icing.
Borderlands Bakery offers a vegan cookie and icing recipe that I trust as a resource. Please note that it is a paid recipe, and I have not personally tested it.
Vegan recipe: Borderlands Bakery vegan cookie and icing recipe — Paid digital recipe.
Basic Baking Supplies
MIXER
A stand mixer is the most convenient option for cookie dough and royal icing. If you are purchasing a KitchenAid, I recommend choosing a bowl-lift model rather than a head-tilt model. In my experience, bowl-lift mixers feel sturdier, while the head-tilt mechanism can loosen over time.
For most home bakers, a 5- to 6-quart mixer works best:
- 5.5-quart bowl-lift mixer: My best all-around recommendation and the “Goldilocks” option for most bakers.
- 6-quart bowl-lift mixer: My personal favorite because it easily fits a double batch of cookie dough. It is a little large for a single batch of royal icing, but it still works.
- 5-quart head-tilt mixer: The most commonly available option, although I prefer a bowl-lift model when possible.
A hand mixer can also work when you are getting started, especially for smaller batches.
SHEET PANS, LIDS AND BAKING SURFACES
- Pans — My preferred size for baking and decorating workflows.
- Pan Lids — Helpful for storing cookies overnight after the icing has dried.
- Pre-cut parchment paper sheets or My favorite: Chua Cookie perforated baking mats — I use the Half Sheet Version 1 with Nordic Ware pans. Use code Chua15Grace23 for 15% off.
Care note for Chua Cookie mat: Do not wash perforated baking mats with scented soap. Rinse thoroughly and make sure all soap is removed before drying.
Rolling Pin and Rolling Guides
I recommend rolling cookie dough to an even thickness so the cookies bake consistently. My preferred thickness is 5/16 inch. You can either use a straight rolling pin with separate rolling guides or choose a rolling pin with guide rings already attached.
Straight Rolling Pin (Pair with separate Rolling Guides)
I recommend a long, straight rolling pin rather than a tapered French-style pin. A straight pin works more easily with separate rolling guides and helps you roll dough to an even thickness. It is much easier to use these longer rolling pins with the rolling guides than the rolling pins with handles.
My original J.K. Adams rolling pin is no longer available, but this option is similar:
Rolling Pin With Built-In Guides
A rolling pin with built-in guide rings is another convenient option because you do not need to purchase separate rolling guides.
Separate Rolling Guides (Pair with Straight Rolling Pin)
Separate rolling guides sit on either side of the dough and prevent the rolling pin from pressing it thinner than your desired thickness.
- Rolling Guides — My original rolling guides. (Mine are 5/16”)
- Another alternative from Brighton Cutters
Budget Option for Rolling Guides
For an inexpensive alternative, purchase two 5/16-inch wooden dowels from a hardware store and place one on each side of the dough while rolling.
If 5/16-inch dowels are unavailable:
- ¼ inch will create slightly thinner cookies and more cookies per batch.
- ⅜ inch will produce fewer, thicker, softer cookies.
Food scale
- Battery-Operated Food Scale — A dependable, lower-cost option.
- Rechargeable Food Scale — My newer favorite because it is rechargeable.
strainer
- Small mesh strainer for powdered sugar
SMOOTHER
- Smoother to smooth cookies immediately after coming out of the oven (while they're still hot)
Cookie Decorating Essentials
gel food coloring
I recommend gel colors for most decorators, especially beginners. They are easier to control than powders and do not add as much liquid to the icing.
- Beginner option: Wilton gel color set — A solid beginner set. I do not love Wilton brown because it's more yellowy than a warm brown.
Brands I prefer:
- Chefmaster (my favorite)
- Chefmaster small-bottle set — More premixed colors in smaller quantities.
- My pick: Chefmaster large-bottle set — My preferred set for frequent decorating. You can mix nearly any color from it and you can use Chefmaster Bakers Rose (pink) and Deep Pink with my lemon royal icing.
- AmeriColor basic gel set — Good colors, but AmeriColor pinks do not work well with my lemon royal icing.
- Artisan Accents — I've never used these but it's reputable brand loved by others I know! Note: I've never tried their pink with my lemon royal icing.
- The Sugar Art gel colors — Highly pigmented and especially useful for black, red, and brown. A little goes a long way.
Four Useful Mixing Colors
- Blue: Chefmaster Royal Blue
- Yellow: Chefmaster Lemon Yellow
- Red: Chefmaster Red Red — medium bottle — Red usually requires more coloring, so the medium bottle is the better buy.
- Pink: Chefmaster Bakers Rose — Works with my lemon royal icing.
Looking for non-artificial food coloring? I don’t currently have a specific brand or product I can confidently recommend, but I’m hoping to have more information and recommendations to share soon.
Cookie cutters
You can start with inexpensive metal or plastic cutters and add specialty 3D-printed shapes as you need them. Specialty 3D-printed cutters are often made to order, so allow extra processing and shipping time.
- Ann Clark cookie cutters on Amazon
- The Beginner's Bundle — If you're looking for a great set of basic cutters, check out this bundle I put together with Brighton Cutters
- Sweet Sugarbelle cutters — Commonly found at Michael’s and JoAnn’s
- Wilton 101-piece cutter set
- Retractable precision knife set — For carefully hand-cutting custom cookie shapes.
See the Specialty Shop section below for a full list of my favorite cookie cutter shops
Tipless piping bags
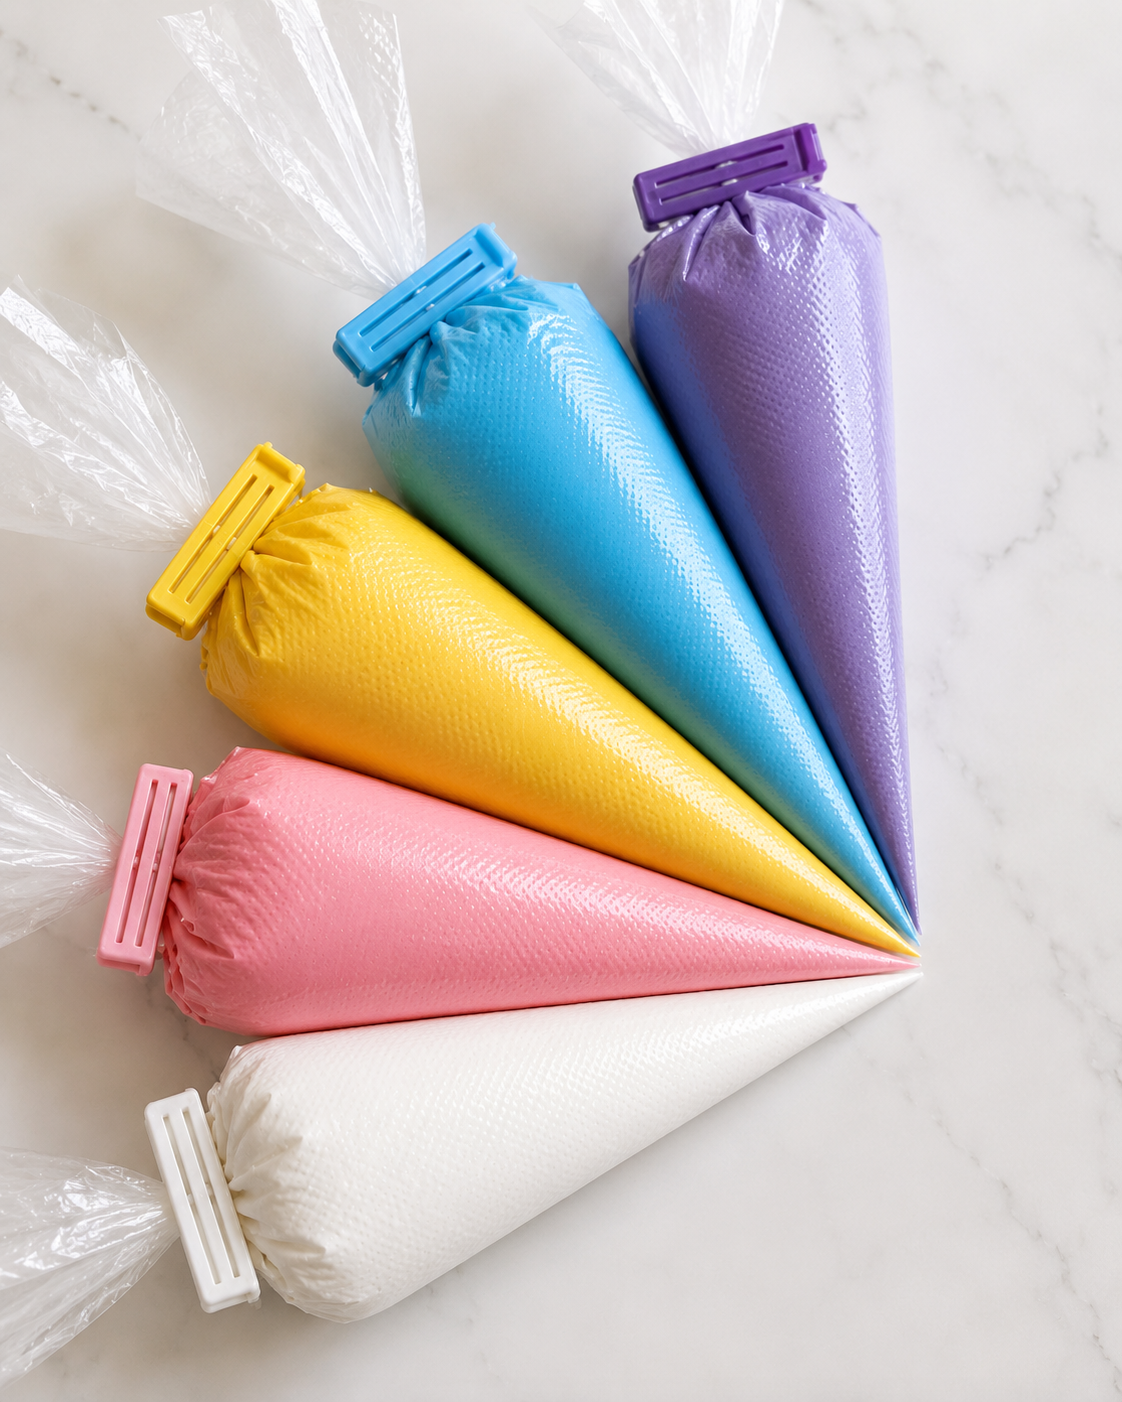
Tipless piping bags are the simplest and most affordable setup for most beginners. Traditional piping bags with tips and couplers—and reusable bags or candy melt bottles—can also be used, but I prefer tipless bags for their ease and lower upfront investment.
Small 10-inch bags generally hold up to about 6 ounces of icing, while 12-inch bags can hold roughly 9 to 10 ounces. Small bags are enough for my classes, since I do not recommend bagging more than 6 ounces at a time, but medium bags are more versatile for larger batches.
Quality matters: poorly made bags can split at the seams or pop under pressure. Avoid overfilling, even when using a good-quality bag.
Unfortunately, my favorite tipless bags from Borderlands Bakery are no longer available. I have put together a few alternatives, although I have yet to find anything I like quite as much:
- Amazon options
- Cookie Cutter Kingdom tipless bags — My favorite Amazon option.
- LoveBB tipless bags
- Weetie tipless bags with scribe
- My Fav quality pick (most like the Borderlands bags): The Sugar Art tipless bags — Available in small and medium sizes.
- Canada options
- Sugar Love Designs
- Cookie Couture (most like the Borderlands bags)
Proceed with caution: Master and Grunderfully Delicious bags are decent alternatives, but I have found the quality less consistent and they may occasionally pop.
Looking for Reusable Alternatives to Tipless Piping Bags? I do not provide instruction for these alternatives, but I am often asked about reusable options. The information below represents the extent of the product guidance I can offer at this time.
I have never used reusable piping bags for royal icing, so I am not able to recommend a specific product. I do, however, have experience using bottles. When I first started decorating, I used plastic piping bags with tips to outline and bottles to flood.
You can use a bottle fitted with a piping tip for soft-peak icing. For anything thicker, such as medium- or stiff-peak icing, you will want to use a piping bag.
Approximate piping-tip sizes:
- Outlining: Wilton or PME size 2
- Flooding: Approximately size 3 for thinner flood icing or size 4 for thicker flood icing
I am less certain about the flooding tip sizes because I used larger flooding bottles without interchangeable piping tips.
Bottle Recommendations
- Large flooding bottle: This style has a larger opening and is the type of bottle I would use for flooding.
- Small bottles: These work well as an alternative to the “small bag” setup used in this guide. They also allow you to switch between different piping-tip sizes and typically come with a size 2 tip.
- Combination pack: This includes both small bottles and a larger bottle in the same style. For this particular set, the opening on the larger bottle may still be too small to comfortably flood a full-size cookie with thicker flood icing.
Bag Clips, Scissors, and Spatulas
- Basic: Rubber bands or use a bag big enough to tie the end with a knot
- Bag Clips
- Borderlands Bakery rolling-pin bag clips
- Grunderfully Delicious bag clips
- Assorted Amazon bag clips (never purchased these myself and some of the sizes will be too big)
- Basic: Whatever scissors you have at home
- Tiny sharp scissors — My favorite for cutting small openings in tipless bags.
- Small silicone spatulas — Useful for mixing and portioning small amounts of icing.
sprinkles
I think everyone should have three kinds of sprinkles (you'd be amazed how much of an impact these sprinkles can have!)
Small White Sanding Sugar:
Medium/Large White Sanding Sugar:
- Hobby Lobby Glitter Crystals — super sparkly!
- Lebrey Edible Sugar Sprinkle
- Wilton Sparkling Sugar — last choice because it sinks into the icing
White Nonpareils:
PME Black Edible Sugar Pearls: the ONLY black pearls that don't bleed
Sprinkle tweezers are by no means essential, but they can make it easier to place small sprinkles precisely.
scribe tools
A toothpick is completely fine for a beginner. A dedicated scribe becomes useful when you want better control or finer detail. I always use these scribes when decorating:
- Thingamagenie — A thicker scribe and boo-boo scraper.
- PME scribe — My favorite for very fine detail work.
- Amazon option – My favorite budget option from Amazon (comes with 6!)
- Note: the pastel scribes in this listing are not sharp enough. I would not recommend purchasing them, unless you prefer to have a scribe that is less sharp.
Water Source
You only need a very small amount of water to thin royal icing. A slow trickle from the tap works perfectly well, especially when you are first getting started.
For more control, you can use:
- Fine-mist spray bottle — Use it only for water.
- Glass dropper — Use it only for water.
- Reusable pipette
These tools are optional, but they can help prevent you from accidentally over-thinning your icing.
lighting
Bright, neutral lighting makes it easier to judge icing colors, see air bubbles, and work on fine details.
Good room lighting is enough when you are starting. If your decorating space is dark or has warm-toned lighting, a daylight lamp can be a worthwhile upgrade.
- Daylight lamp: This is one of my most-used tools. I use it for both cookie decorating and filming.
Drying method
Decorated cookies can dry uncovered on a flat surface at room temperature. You do not need special drying equipment. A tabletop fan can improve airflow, while a dehydrator is an optional upgrade for decorators who want more control over crusting and drying.
The dehydrator I use is no longer available, but this similar option has adjustable time and temperature controls:
- Food Dehydrator — Optional splurge.
For dehydrator use:
- Always set to lowest temperature (mine goes to 95 degrees)
- Don't leave for more than 60 minutes total (I typically leave my cookies in for 10-15 minutes spurts)
- Cover the trays with either parchment paper or silicone mats (you don't want the cookie to get dehydrated on the bottom!)
royal icing storage
For complete instructions, read How to Store Royal Icing.
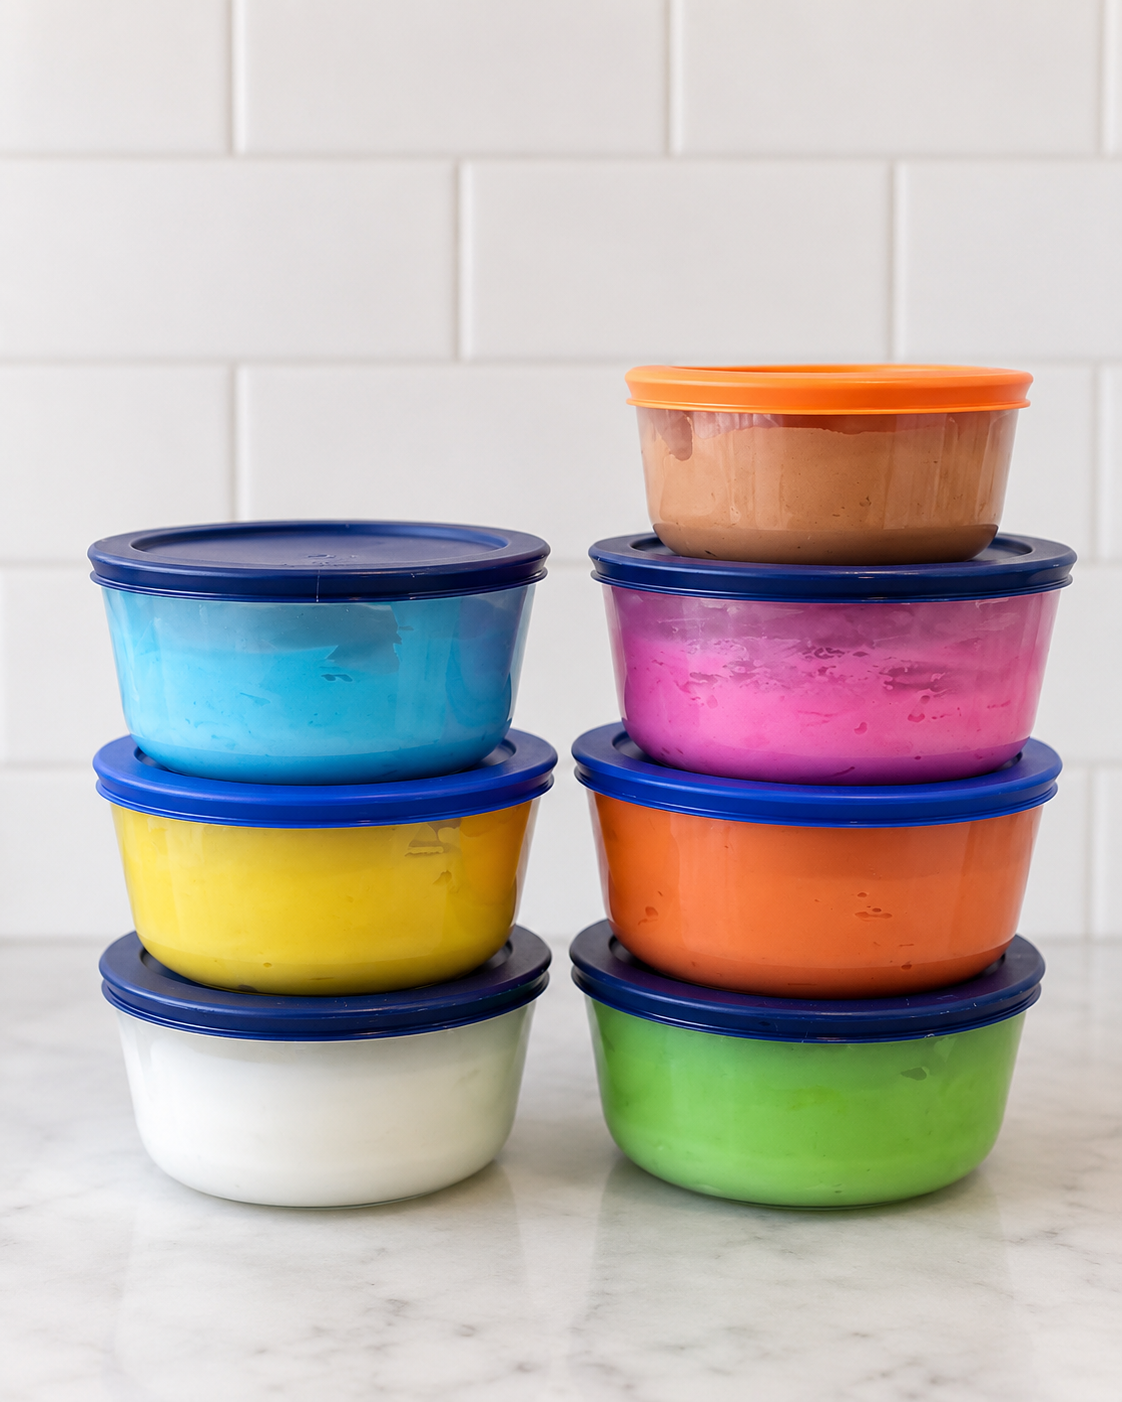
- Basic: Any bowl topped with a paper towel or dish towel, then topped with a plate (& something heavy) to give it an airtight “seal”
- My pick: Pyrex bowls with lids variety set
- 4-cup Pyrex bowls with lids — Best for approximately one recipe of icing.
- 7-cup Pyrex bowls with lids — Better for larger batches.
Advanced Cookie Decorating Tools
These tools can make certain techniques easier, but none of them are necessary when you are first learning.
Projector
I originally started with a Pico projector, but that model is no longer available. I later upgraded to a brighter Bluetooth projector, which is the option I recommend when budget allows.
- My pick: Bluetooth mini projector — My preferred projector of the two I personally owned.
- AKASO mini projector — I have not personally used this model, but I know decorators who use and like it.
cookie swivel
A cookie turntable helps you work from multiple angles without repeatedly touching or moving the cookie. The swivel I used previously is no longer for sale, so I recommend this clear acrylic alternative:
airbrush
I personally don’t use one and never have, so I cannot recommend one. Sorry!
crackle tool
You do not need a specialty tool to create the crackle technique, but you will need something with a smooth, rounded end.
The rounded end of a clean pen, paintbrush, or scribe tool can work perfectly well. A dual-ended scribe is a convenient option because you can use the pointed end for regular decorating and the rounded end for creating the crackle effect.
Paintbrushes, Luster Dust, Paint, Glitter, and Edible Markers
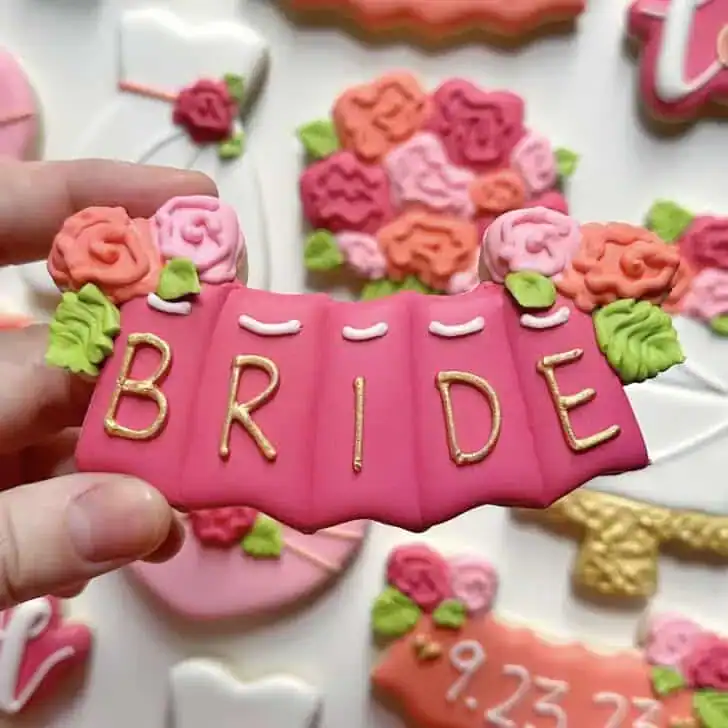
Metallic dusts and glitter are a hot topic in the cookie/cake decorating world. The most mainstream gold dusts made for painting are labeled non-toxic but not edible. That said, the cake industry has been using these for FOREVER. Proceed at your own risk. I now primarily use edible products from The Sugar Art.
- Sweet Sticks edible paint — I especially like premixed white and black paint.
- Powdered color — I use for both dry dusting and painting
- The Sugar Art edible glitter — I use White Diamond 99% of the time
- The Sugar Art edible luster dusts — I use for both dry dusting and painting
- Wedding Gold luster dust — My favorite edible metallic gold.
- Nu Silver luster dust — My favorite silver.
- Dry dust pump — I buy these to DIY a dust pump for my edible glitter from The Sugar Art
- The Color Solution — A liquid designed for mixing edible paint.
Note: Color Solution can be substituted with a very high-proof clear alcohol, such as 190-proof or 151-proof Everclear. Vodka may also work if the proof is high enough. The alcohol evaporates as the paint dries. For those avoiding alcohol, some decorators use lemon extract, although I have not personally tested it.
- Paintbrush Set — Includes the small detail and angled brushes I use most often. Pictured below
- Dot brush — For doing metallic polka dots…especially helpful when you don’t have an airbrush–I don’t!
- Borderlands Bakery mini scoop — For scooping metallic dusts and powdered colors
- Small reusable mixing jars


Edible Markers
- Fine-detail edible markers — My favorite for fine lines.
- AmeriColor black food writers — My favorite for thicker lines.
- FoodDoodler markers — My favorite for sketching shapes before piping.
Packaging and Cookie Business Supplies
Cookie Bags and Boxes
- ClearBags — Clear bags for individual cookies.
- Cello bags — For heat sealing cookies.
- BRP Box Shop — Bakery boxes in a wide range of sizes.
- Southern Champion window bakery boxes — The boxes I use for classes.
Heat sealing sounds fancy, but the setup can be simple. Flat heat-seal bags are much easier to work with than trying to seal gusseted bags. My sealer does not automatically cut the bag, which keeps the cost down.

For the full process, read Heat Sealing Cookies.
Filming and Content-Creation Equipment
These products are for decorators who film classes, tutorials, or behind-the-scenes content. They are not needed for cookie decorating itself.
- Tripod/Phone Mount — The stand I use for overhead decorating videos and classes.
- Desk Lamps and Filming Stands — I have both the weighted wood and marble bases; I prefer marble because it is heavier.
- LED Desk Lamp — For extra light directed at the cookies or table.
- Softbox Light — For additional room lighting.
- Three-Light Softbox Kit — A fuller room-lighting setup that still stores fairly compactly.
Favorite Specialty Supply Shops
The product links above are organized by use, so you do not have to sift through repeated retailer lists. If you prefer to browse by shop, these are a few of my favorite small businesses. You can also find many products at stores like Michael’s and JoAnn’s.
General Cookie Decorating Supplies
- The Cookie Countess
- The Flour Box
- Grunderfully Delicious
- How Sweet Is That (Based in Canada)
- The Sugar Art
- Truly Mad Plastics
- Borderlands Bakery
- Sugar Love Baking Supplies (Based in Canada)
cookie cutters
- Ann Clark Cookie Cutters – My favorite shop for metal and Amazon-sourced cutters.
- Bobbi's Cutters
- Brighton Cutters — My favorite shop for plastic 3D-printed cutters (and where most of my class cutters are from).
- The Cookiery — Canada-based.
- Crumbs Cutters
- Cut It Out Cutters
- Holly Fox Design
- KaleidaCuts — Another favorite 3D-printed shop.
- Semi Sweet Mike
- Sweet Designs Shoppe — Another favorite 3D-printed shop.
- Sweet Silhouettes
- Periwinkles Cutters
- Yomi Market
Stencils
scribes
sprinkles
recipes
- Vegan icing and cookie recipe
- Soft bite royal icing (aka Frankenfrosting that uses corn syrup)
- Lemon vanilla cookie recipe
Shopping Outside the United States
Availability varies by country, but these shops can make it easier to find cookie decorating products without ordering everything from the United States.
- Sugar Love Baking Supplies — Canada (my favorite Canadian shop) — Use code GRACE15 for 15% off.
- How Sweet Is That – Canada
- Cakers Warehouse — Australia
- The Cake Decorating Company — United Kingdom
Useful Canada-Based Product Links
All of the products below are sourced from Sugar Love Baking Supplies. Check out their website for more!
- Tipless piping bags
- Chefmaster meringue powder collection
- Ann Clark cookie cutters
- Chua Cookie pink perforated baking mats
- AmeriColor 0.75-ounce gel colors
- AmeriColor 4.5-ounce gel colors
- Chefmaster gel colors
- Gold luster dust
- Medium white sanding sugar
- White nonpareils
- Ateco piping tips
- Embossed impression parchment — Reusable patterned sheets for adding texture to icing and other decorating materials.
Related Cookie Decorating Resources
- How to Save Money When Cookie Decorating
- How to Store Royal Icing
- Heat Sealing Cookies
- No-Spread Sugar Cookie Recipe
- Royal Icing with Meringue Powder
A Final Note
You can make beautiful royal icing cookies with a very basic setup. Start with the essentials, learn what you enjoy using, and add specialty tools only when they solve a real problem for you.
I would like to send a gift card to a friend for her birthday. Do you offer gift cards?
What a great idea! Yes, we do: https://thegracefulbakershop.com/products/the-graceful-baker-shop-gift-card?_pos=1&_psq=gift+card&_psid=04065d020&_ss=e