When I first started decorating, heat sealing cookies seemed like such a fancy thing that I never thought I’d have the patience for or could afford to do. Little did I know that heat sealers aren’t that expensive! And, it’s such an easy way to preserve the cookies and elevate your packaging/delivery game.

*DISCLOSURE: This post contains affiliate links which means that, at no additional cost to you, I may earn a small commission if you make a purchase from one of my links. I greatly appreciate your support!
Supplies

Heat Sealer
The number one item you need to heat seal cookies is a heat sealer! I have this one. It’s the standard model that most people have. There’s nothing fancy about it, but it gets the job done!
There’s also a version that cuts the bag for you, but I’ve heard mixed reviews on just how effective it is. I prefer to just use scissors to cut off excess bag.
Bags
The next must-have item are GOOD cellophane heat seal bags. My favorites are from Borderlands Bakery. (I trust every product she sources!)
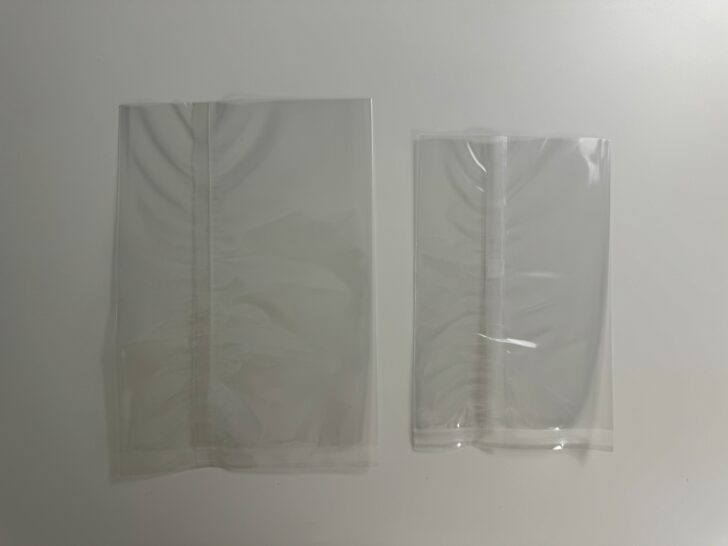
There are MANY different size of cello bags, but Borderlands Baker sources the most common sizes (in inches):
- 3×5 (minis)
- 3×9 (stack of 3 minis)
- 4×6 (standard 3-3.5″ cookie)
- 5×7 (4-4.5″ cookie)
A few things to keep in mind when selecting bags:
- It’s important to note that not all cello bags are created equal; they are NOT all meant to be heat seal bags!
- Heat seal bags have thicker plastic that are meant to be heat sealed.
- With other bags, the plastic is so thin it basically melts in the heat.
- Within the range of cello bags, they’re not all going to have the same quality. Cheaper ones will not have a good seam on the sides and, therefore, will not properly seal.
- You also want to make sure that you are buying food-grade cellophane bags.
And, for all of the reasons above, this is why I always buy the Borderlands Bakery bags! I never skimp on Amazon alternatives, for example. (Although there might be some good ones out there I just don’t know!)
Extras
- Scissors: definitely make cutting the bags easier! (Maybe this isn’t really an extra! lol)
- Heat sealing table: a luxurious addition if you’re heat sealing a lot!
- Bows: a fancy way to finish off
How to Heat Seal Cookies: Step-by-Step Instructions
Read on for brief step-by-step instructions on how to heat seal cookies. Really, it’s a lot easier than you might think!
Step 1: Place your cookie in a heat seal bag
Make sure that the seam is on the back side (not on the front). Also, sometimes I will turn a cookie to the side if the bag is far too wide for the cookie. I often will bag all of my cookies first and line them up in a tray before then heat sealing all of them.
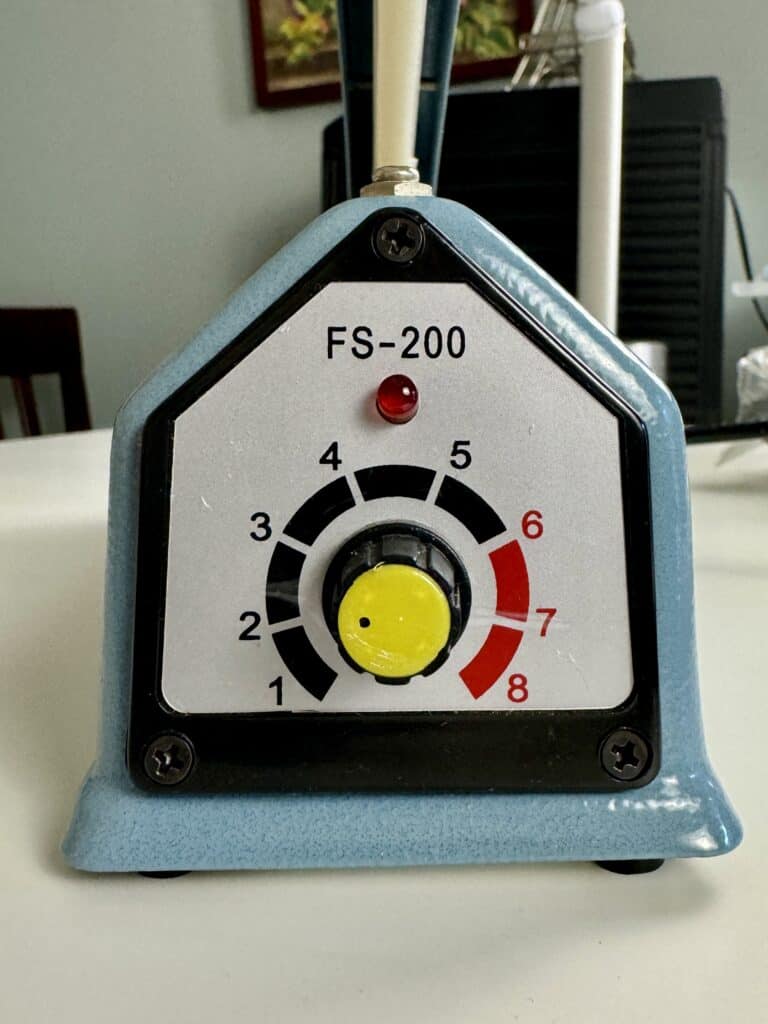
Step 2: Set your heat sealer setting
The setting you’ll need depends on the bags that you’re using. Thinner plastic will need a lower setting, whereas thicker plastic will need a higher setting. My bags from Borderlands Bakery need a roughly 2.5 setting. The machine does not need any time to warm up; it’s ready to rock and roll as soon as you plug it in and select a setting!
Step 3: Heat seal the bag
This is probably the hardest part of the whole process. A few things to keep in mind:
- How long you need to press down depends on the setting and the thickness of the bags. If it’s just the right combination for both, it should be about 1 second.
- You’ll want to seal as close to the top of the cookie without hurting it. The idea here is that you don’t want the cookie swimming around in the bag after it’s sealed. The act of heat sealing the bag both preserves freshness and can help protect the icing designs from damaging.
- If you hold for too long, you’ll overheat the seal and burn through the bag. This isn’t necessarily a bad thing as the bag will still completely seal, but it just doesn’t look as good.
- If you want to be extra (or just make the whole process more ergonomic/easier to do), upgrade to a heat seal table to rest the cookies on!

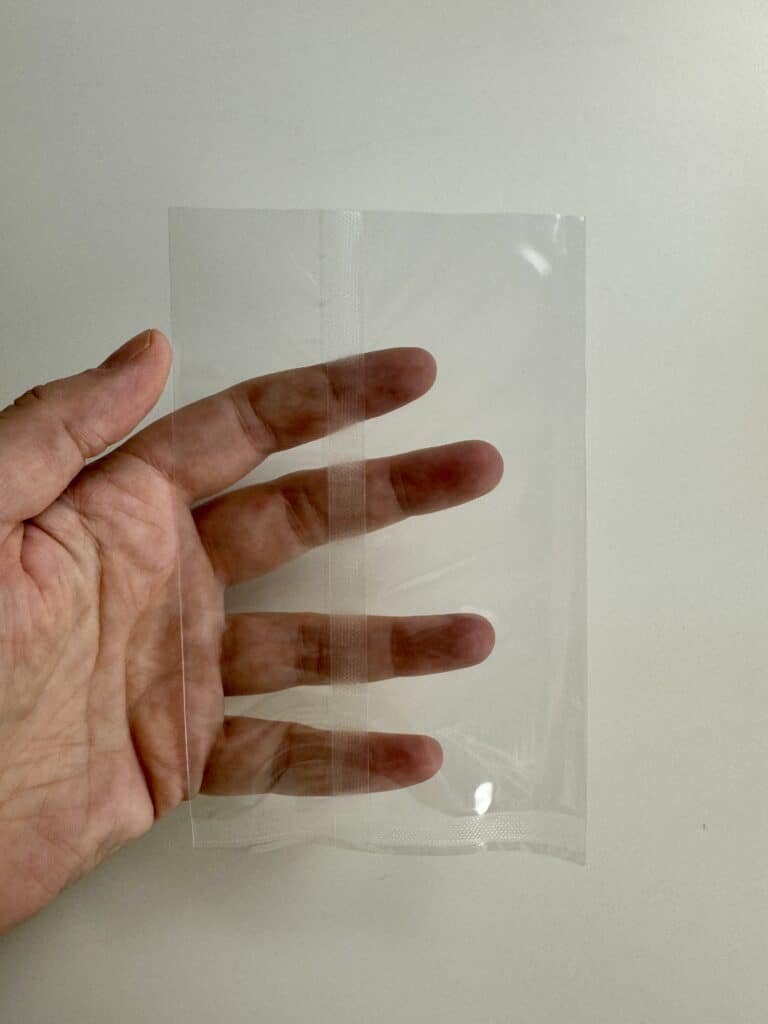
After sealing, your bag should look something like this. Note that the plastic is still “straight”, as in I did not over-seal so that the excess plastic is folded over. You can also test the seal by smooshing the bag to see if any air comes out. (Obviously be careful not to ruin the cookie!)

Step 4: Decide what to do with the excess bag
Unless you have the magic Goldilocks bag to cookie size ratio, chances are you are going to have some excess bag left on the top. There are a few things you can do with it:
The simplest solution is to just trim the top. I would leave about 1/4″ and make sure that I do a clean cut across the top. This looks polished and presentable as is.
Or, don’t do anything! Rock the excess. This is especially a good idea if you’re not as good at cutting a straight line 😉 I do this when I’m just shipping cookies to family and friends. For this, I will just fold the excess behind the back of the cookie. Some might even say the fold-over looks more presentable than the cut!
If you’re just rocking the simple fold or cut, you can leave as is or put in a fancy cookie packaging box. Back in the day I would buy all of my fancy cookie boxes from Clear Bags.

If you want to be extra with the fold-over approach, might I suggest adding a (branded) sticker on the back? These are some older stickers I got from Labelin way back when I sold cookies.

You can also tie the top of the bag with ribbon or a twist tie bow (note: there are different sizes and colors of bows). For this approach, you would need to use a taller bag than the one I used. (I would use a 9″ tall bag, which would usually result in too much bag. I would have to trim a bit). Below is an example of what mine looked like:

Other cookiers I’ve seen add toppers to the top of the bags (you know, like you would see on a product at the store). I’ve never gotten *that* fancy with my packaging, so I can’t help there!
How to Ship Cookies
Want to ship the cookies you just so wonderfully heat sealed!? Check out this post here to do just that.
Gaby
Monday 1st of December 2025
Do you put cornstarch before heat sealing the cookies? I’ve seen some people do that
thegracefulbaker
Wednesday 3rd of December 2025
I do not! never heard of trying that :)
Gaby
Sunday 30th of November 2025
Do you brush cornstarch on your cookies before heat sealing them? I’ve seen other creators do that and don’t know if it’s necessary
thegracefulbaker
Wednesday 3rd of December 2025
I do not! Have never tried that :)
Mel
Saturday 26th of July 2025
How long will they stay fresh heat sealed at room temp? Or do I need to freeze to keep fresh? Thanks!
thegracefulbaker
Friday 22nd of August 2025
technically about a month, but I prefer to freeze if they're not consumed within a week! definitely check out this post for more info on freezing: https://thegracefulbaker.com/can-you-freeze-decorated-sugar-cookies-how-to-store-royal-icing-cookies/
Can You Freeze Decorated Sugar Cookies? How To Store Royal Icing Cookies
Monday 10th of February 2025
[…] If keeping the cookies for longer than 1 week, I recommend freezing. For freezing, I recommend layering the cookies in between PARCHMENT (not wax) paper in an airtight container (unless you heat seal them like I do, then you don’t need to do this!). Check out this blog post on heat sealing. […]
Sarah
Tuesday 29th of October 2024
I have a Foodsaver vacuum sealer which has the ability to heat seal. Do you know if that would work to heat seal the bags? Thanks!
thegracefulbaker
Wednesday 30th of October 2024
Gosh I'm so sorry I have no idea!