Read on for my signature recipe for royal icing with meringue powder. It’s THE best recipe and sure to please the tastebuds (as well as lots of general information and tips & tricks).
(And if you haven’t already read it, start out with my What is Royal Icing? post for a basic foundation.)

*DISCLOSURE: This post contains affiliate links which means that, at no additional cost to you, I may earn a small commission if you make a purchase from one of my links. I greatly appreciate your support!
Post Directory
(click on a section to skip to it)
- Royal Icing Recipes
- My Signature Royal Icing Recipe
- Ingredients
- Step-by-Step Recipe Instructions
- Tips & Tricks for Success
- General FAQs
- Recipe FAQs
- Preparation FAQs
- Recipe Card & Recipe Video
Royal Icing Recipes
There are a variety of royal icing recipes out there, but they all more or less start with the same base: water, powdered sugar and meringue powder. The standard royal icing recipe is vanilla flavored (flavored with vanilla extract), however there are other recipes flavored with lemon (like mine!) and just about any other extract you can think of.
There is another type of royal icing recipe that has become quite popular and it is referred to as “frankenfrosting” as it is a mix between royal icing and glaze. The key addition here is corn syrup: this gives the icing a slight softness/bite to it rather than the usual hardness it dries to.
Personally, I do my own take on standard royal icing. But I am considering trying adding some corn syrup one day to see how it affects the bite!
My Signature Royal Icing Recipe
What Makes My Royal Icing Recipe Unique?
My recipe is traditional in that it uses meringue powder, powdered sugar, liquid and flavoring. However, what makes my icing unique is that I use lemon juice (instead of water & vanilla) for both liquid AND flavoring (once mixed in the mixer I do use water to thin for the different consistencies). My cookies have been described as a sugar cookie meets SweeTART. That’s a win!
What Are the Pros and Cons to Using a Lemon Royal Icing?
Pros:
- Tastes great: I’ll admit that I grew up in a lemon household (thanks to my mom), but seriously, though, the lemon icing balances SO WELL with the vanilla sugar cookie! So many people have described my cookies as sugar cookie meets SweeTART. I’ve gotten plenty of hesitation to my lemon icing, but 9 times out of 10 people love it (including kids).
- Never have to wipe down equipment: Because of the highly acidic environment from the lemon juice, I never have to worry about fat contamination (and therefore I never wipe down my equipment with vinegar/lemon juice before mixing).
- I rarely have issues with color bleed: OK, I’ll admit that I don’t actually know if this has anything to do with the fact that I use lemon juice, but I do know a lot of other people struggle with color bleed and I rarely ever do. I’d say 95% of cookiers use a vanilla recipe and of those that use lemon juice, I’d hazard a guess that I’m the only one that uses as much as I do (most just do a couple TBSPs).
- Softens the cookie: To some this might be a downside, but I think it’s a positive! After the icing dries, I’ve found that the cookie tends to soften a bit more. Maybe it’s the lemon juice seeping through? I really don’t know 🙂
Cons:
- Can only use certain pink food colorings: due to the highly acidic environment of the lemon juice, not all pink food colorings will work. I’ve found that the Americolor and The Sugar Art Master Elite pinks do NOT work. However, the Wilton and Chefmaster pinks work like a dream!
- Some black edible markers turn green after awhile: I’ve found that some brands of black edible markers will turn a slight green after sitting on the dried icing for a few days.
- Not everyone likes lemon flavor: There will always be that one client or that one person that REALLY doesn’t like lemon flavor. Up to you if you want to cater to them or just do what makes your heart sing 🙂
- Softens the cookie: While I see this as a pro, those who prefer a crunchy cookie will see this as a con 🙁
What If I Do Not Like the Strong Lemon Flavor?
First off, I’m obviously biased and would suggest giving the lemon recipe a try! Just about everyone that doesn’t think they’re going to like my lemon icing ends up loving it! A great first compromise is to try the first suggestion…
1. Use less lemon juice: Play around with subbing water 1:1 for the lemon juice. Start with 1/2 water and 1/2 lemon juice and see what you like!
2. Use water and extract instead (no lemon juice): You can sub the lemon juice with water and add 1 TBSP of vanilla extract. [You can use any oil-free extract or emulsion.] Your NEW liquids for the recipe are: 1 TBSP of extract plus 1/2 cup plus 1-3 TBSP water. If going this route I recommend adding just a pinch of salt to the recipe.
*IF YOU ARE GOING TO MAKE A VANILLA/NON-LEMON RECIPE:
Make sure to wipe down all of your tools etc with vinegar or lemon juice before making your icing. Royal icing does not mix well with fats (oils, butters, etc.) and if any fats are introduced to a vanilla recipe during mixing they can ruin the icing so that it does not dry correctly. This is not a concern with my lemon juice recipe since the acidity of the lemon juice seems to counteract any fat introduction (at least I’ve never had an issue and I never wipe down my equipment before use).
Ingredients

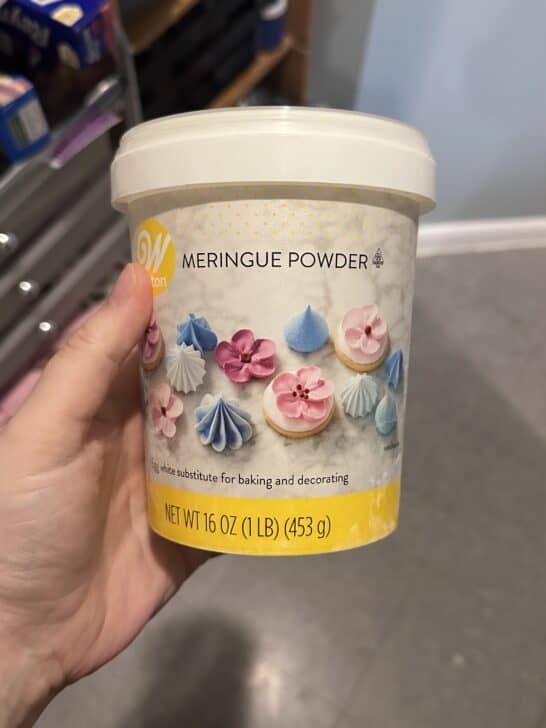
Meringue Powder
If you are going to use a recipe with meringue powder (like mine), do NOT just buy anything. These are the only brands I can personally or tangentially vouch for:
Powdered Sugar
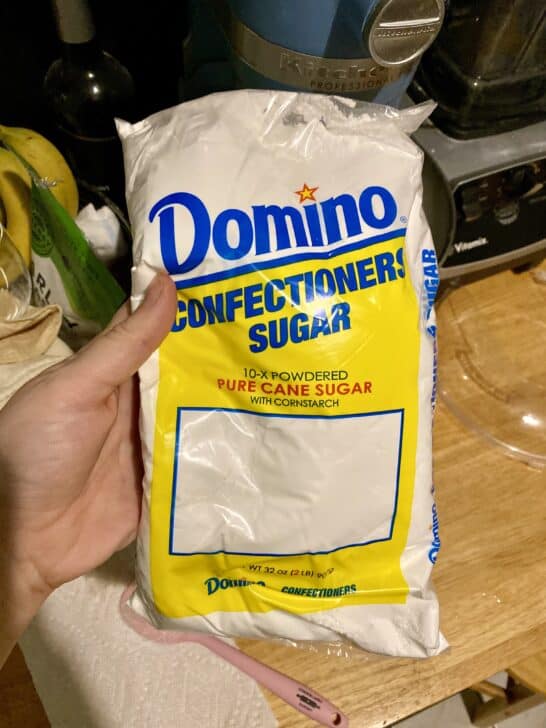
I always buy 2 lbs bags of powdered sugar and either the Domino brand or whatever the store brand is. So far I haven’t noticed a difference! It’s important to note that powdered sugar in the US includes corn starch.
I personally have never sifted my powdered sugar, but if you’re consistently finding that your source turns out lumpy, then it might be worth it for you!
Lemon Juice
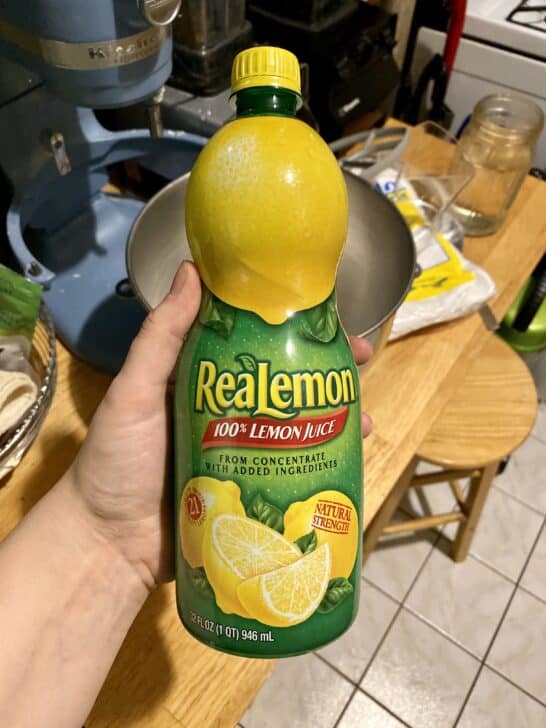
You MUST use only bottled lemon juice! I’ve heard many stories gone wrong of attempting to use fresh lemon juice. It’s something about the acidity level in bottled being more consistent/predictable than fresh lemon juice.
I usually use the ReaLEMON brand, however I might have purchased the grocery store brand before. I don’t think it really matters as long as it’s bottled.
If you’re going to use something other than lemon juice (like vanilla or almond extract), just make sure it has NO fat source in it!
Step-by-Step Instructions for My Royal Icing Recipe with Meringue Powder
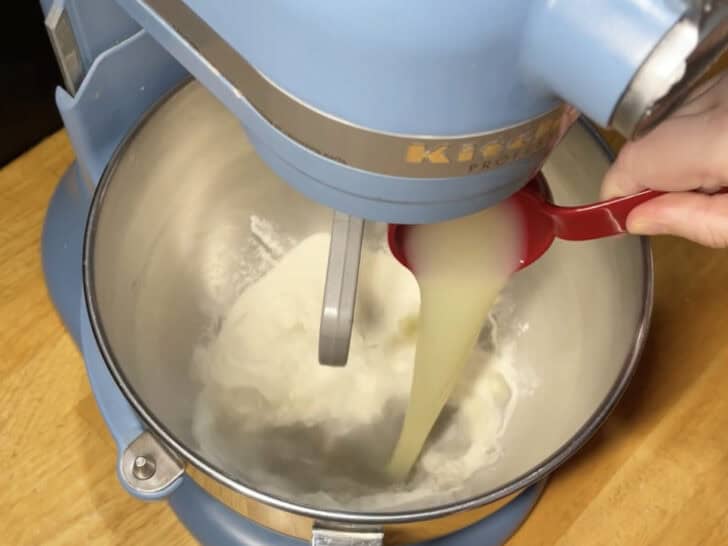
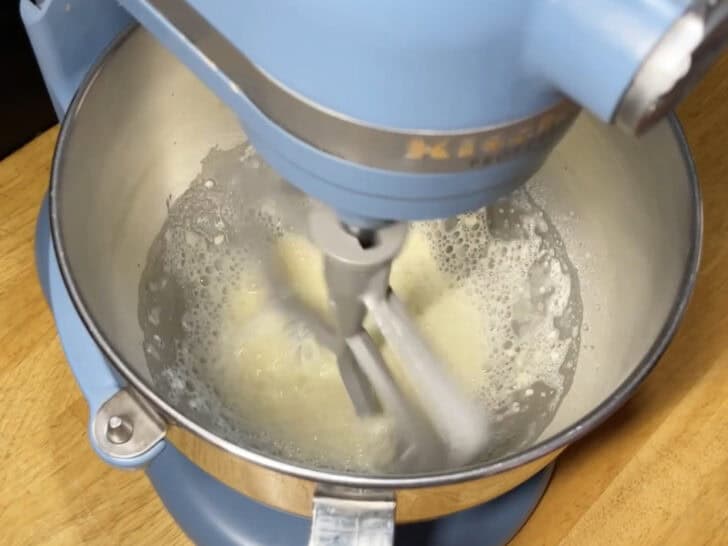
Step 1: Mix meringue powder with lemon juice
Using a paddle attachment (or whisk attachment if you prefer), beat meringue powder and 1/2 cup + 2 TBSP lemon juice on medium high (speed 6) until a beer-like foam forms (approx. 1-2 minutes). Scrape down the sides at least once.
Optional: check out how to whisk the meringue powder BY HAND instead of using the electric mixer (this is a new addition to my method). Both options work–with the electric mixer or with hand whisk. Doing everything with the stand mixer is the more straightforward “beginner” approach, whereas the hand whisk adjustment takes your technique up a notch (the hand whisk approach “melts” the meringue powder better and is less likely to result in clumps from the meringue powder in the final icing).
More detailed breakdown for the 1-2 minutes:
1. Add meringue powder to bowl (45 grams)
3. Add lemon juice to bowl (1/2 cup + 2 TBSP)
2. Beat on medium (speed 4) for 30 seconds
3. Scrape the bowl
4. Beat on medium high (speed 6) for 1 minute
5. At this point you have reached 1.5 minutes of beating. It is OK to beat for longer if needed! Almost impossible to over mix at this stage.
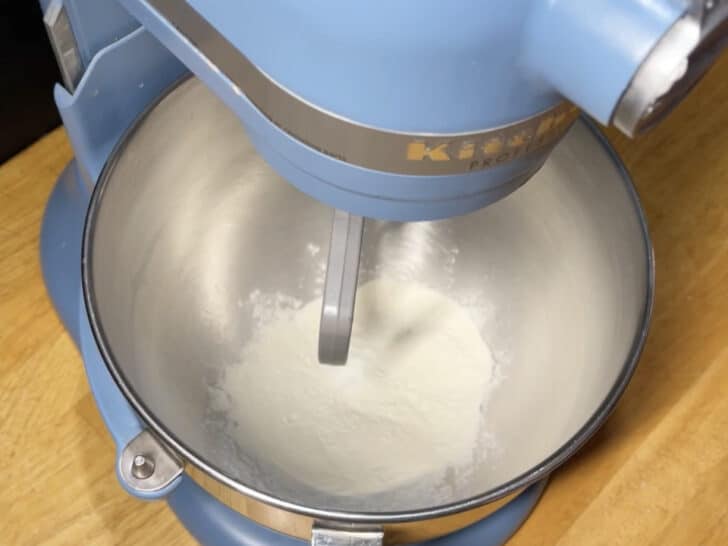
Step 2: Add powdered sugar
1. Add in the powdered sugar.
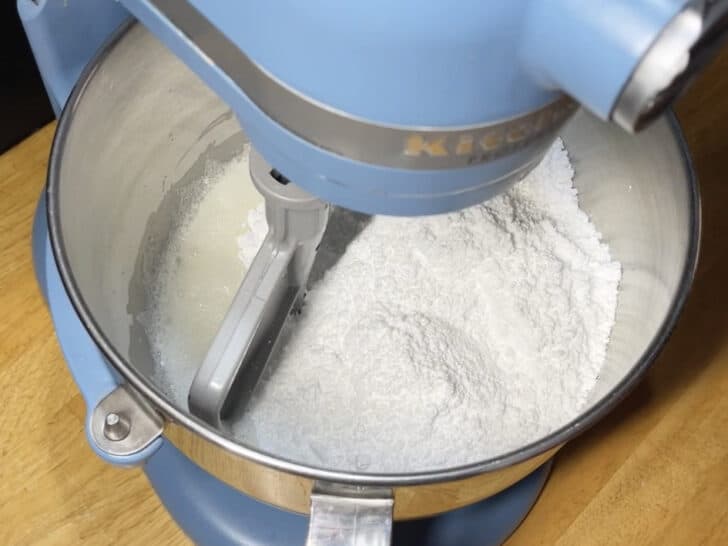
2. Mix on lowest speed until incorporated.
3. Scrape down the sides.
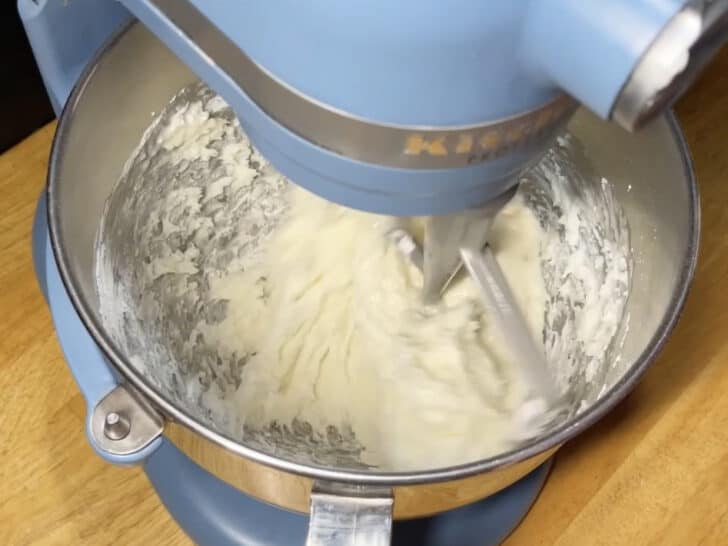
Step 3: Mix icing to final stage
Mix icing on medium speed for 2-4 minutes until a fluffy icing forms at either a stiff or medium peak, depending on yours needs (depending on your environment and desired consistency, you may need to add some or all of the additional 2 TBSP lemon juice).
More detailed breakdown of the 2-4 minutes (*All indicated speeds are for a KitchenAid stand mixer):
1. Stir on low for 30 seconds
2. Beat on medium (speed 4) for 30 seconds
3. Scrape the bowl
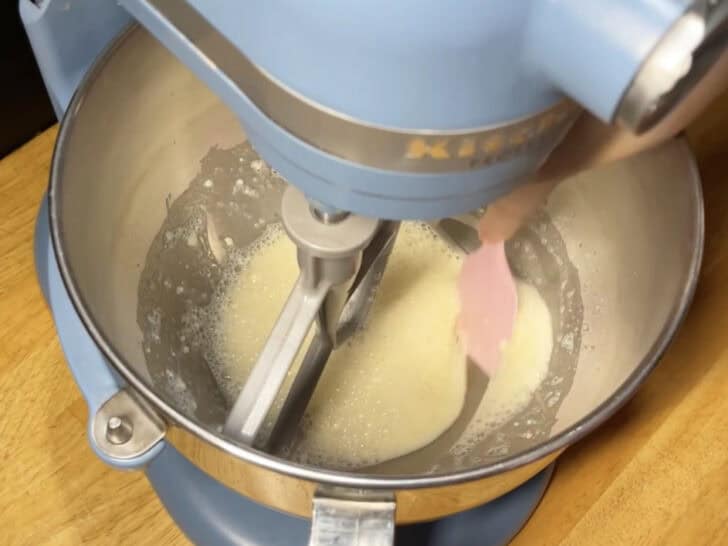
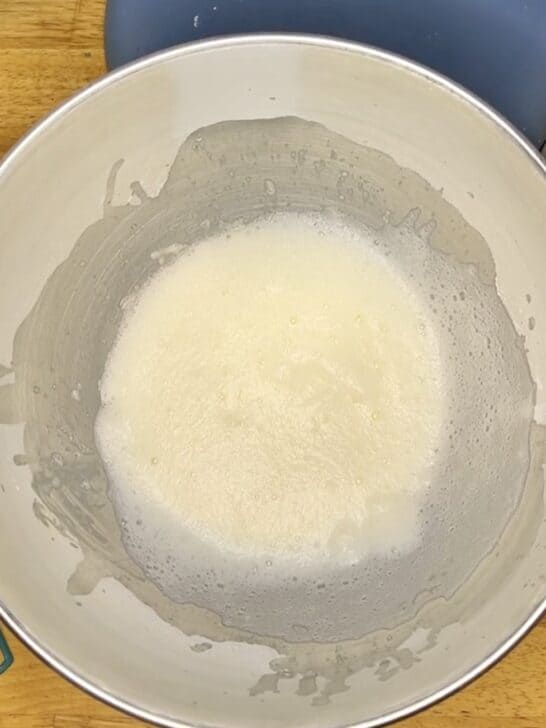
Below is what the icing should look like at this point:

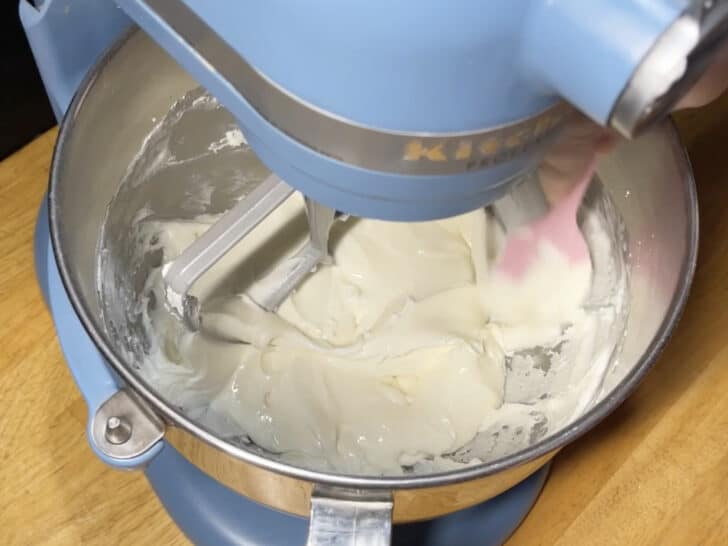
4. Beat on medium (speed 4) for 1 minute
5. Scrape the bowl – if you need more liquid, now is the best time to add any or all of the remaining 2 TBSP of lemon juice
6. Beat on medium (speed 4) for 30 seconds (either for one final spin or to incorporate the additional liquid)
7. At this point you have reached 2.5 minutes of mixing. If you added additional liquid, you may want to beat for another 30 seconds to more fully incorporate. If you need to continue to adjust liquid, you still have more time to beat the icing before it is over mixed.
Below is what icing should look like at this point:
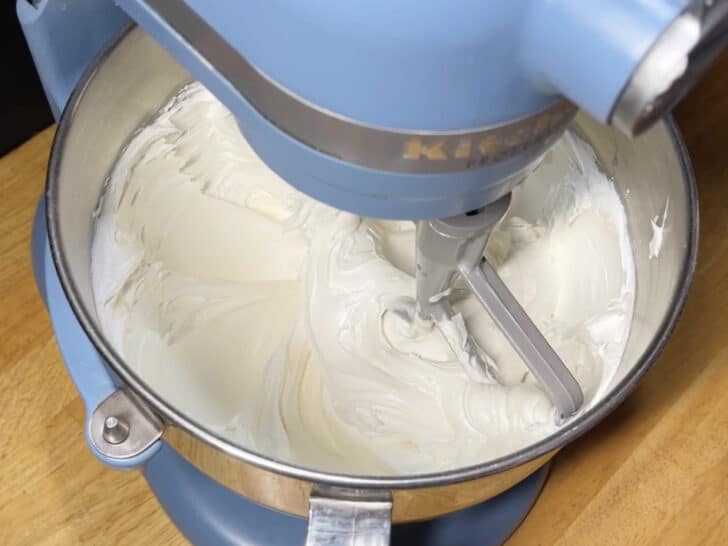
Icing should either be at a stiff peak piping consistency or medium peak piping consistency (if it’s much stiffer than a fluffy stick peak, then add more water).
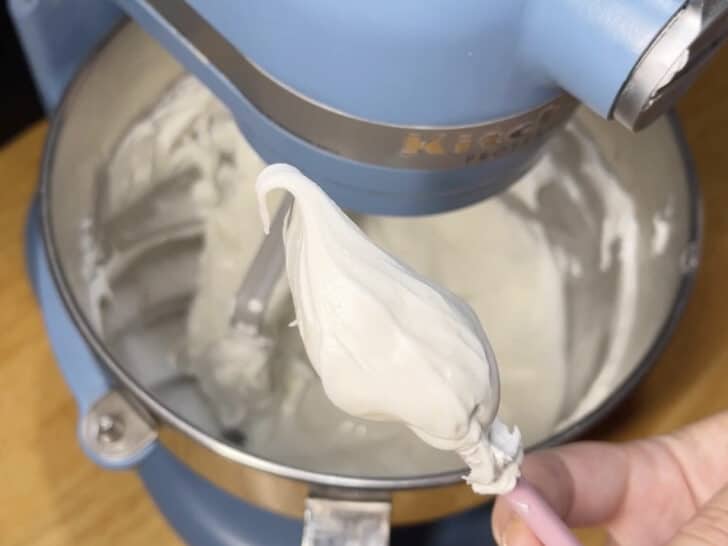
Stiff peak piping consistency:

Medium peak piping consistency:
Jump to Post Directory / Top of Page
Tips & Tricks for the Best Royal Icing with Meringue Powder
Work in the most temperature/environment-controlled space as possible
Royal icing is VERY sensitive to the environment that you’re working in.
Very hot and humid environments are definitely the worst! You’ll need less liquid in the base recipe and sometimes in super humid environments the icing will never dry properly.
Cold and dry environments are not as bad, but certainly something to keep in mind. If your air is very dry, the icing will dry a lot faster (which can be good or bad depending on what you’re doing!) You will also need MORE liquid in a dry environment.
And keep in mind: even if you live in a humid area, if you are cranking the air conditioner in your cookie room then chances are you’re actually working in a dry environment!
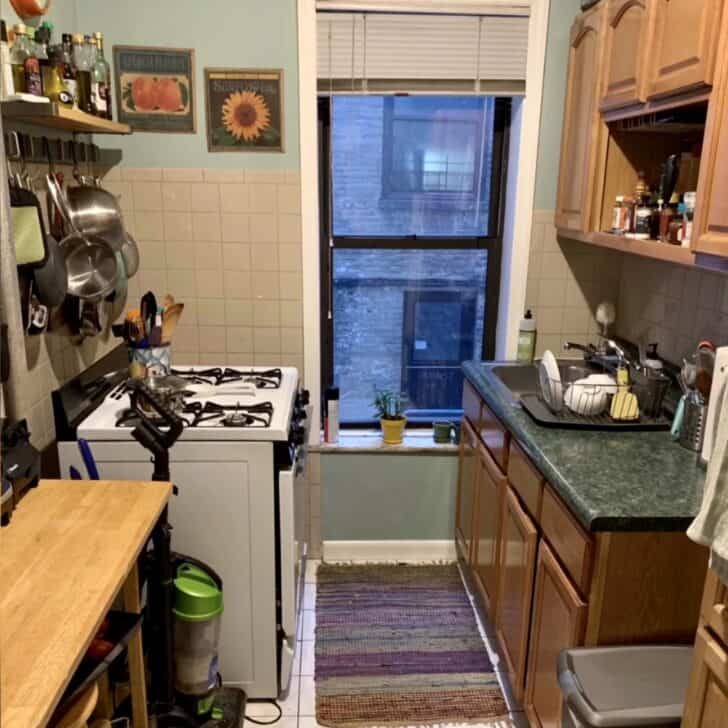
For many years I did not have an air conditioner in my kitchen or living room (where I do all of my cookie work). Below is a picture before AC, but I finally DID get a window unit for the kitchen. Life saver!!!
Do not use cheap meringue powder
Meringue powder is what makes royal icing, well, royal icing! You certainly can’t make royal icing without an egg product (then it’s just… a glaze) and when you do use it you want to make sure you’re using a reputable brand.
The only brands of meringue powder that I have good personal experience with or know people that use it and love it are: Wilton, Chefmaster and Genie’s Dream. I have not heard good thing about Judee’s meringue powder on Amazon.
If you’re not able to access meringue powder and need to use a different egg white product, I’d suggest checking out Haniela’s royal icing post.
Wipe down all equipment with lemon juice/vinegar (if using a non-lemon juice recipe)
Royal icing does NOT play well with fat. In fact, fat contamination with your icing can ruin it! And you won’t know until the cookies are drying 🙁
If you are using any extract-based recipe (vanilla, almond, etc.) I HIGHLY recommend always wiping down all equipment (mixer, attachments, bowls, spatulas) with lemon juice or vinegar before making a batch of icing.

The exception to this is if you are using my lemon juice recipe. I have NEVER wiped down my equipment before making icing and I’ve never had issues with fat contamination. My only assumption here is that the lemon juice in the recipe negates the need to wipe down equipment first.
Always put a dollop of icing on a plate after making the base recipe
After I’ve made my base recipe, I always put a little bit of icing on a plate. It has time to dry either while I’m mixing consistencies or it sits there for a few hours if I’m not ready to move to the next step yet.
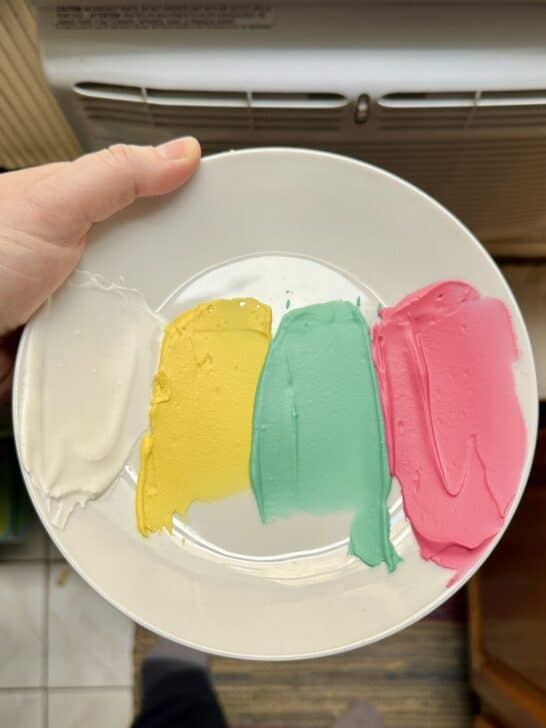
Either way, within 15-30 minutes the icing on the plate should start to crust. If it’s not crusting, then you know something is wrong with your icing! If it’s not crusting the icing is likely ruined either by fat contamination or over mixing. Not ideal, but at least you know now instead of after coloring and decorating 🙂
Always mix the meringue powder separately first
In the recipe card down below and in my YouTube video you’ll see that I mix all liquid with the meringue powder first with the paddle attachment of my stand mixer (you can also use the whisk attachment but I hate doing more dishes than absolutely necessary). The goal at this stage is to bring the meringue powder to a nice (beer) foam texture.
Why do I do this? This is for two main reasons:
1) To better incorporate all of the meringue powder. Have you ever had tiny lumps in your icing that got stuck in the tip as your were trying to pipe? Chances are this is meringue powder that was never full dissolved/incorporated. By mixing it first and alone with just the liquid it gives it a better opportunity to fully dissolve.
2) To help prevent over mixing. Over mixing is one of the many ways royal icing can go wrong, and I’ve found that it can only be over mixed AFTER all of the ingredients are mixed together (when the sugar is mixed with the meringue powder). On the flip side, I’ve seen with experience it seems impossible to over mix the meringue powder on its own first. This way you can make sure the meringue powder is good to go before adding the powdered sugar.
Next level: whisk the meringue powder by hand first!
Something that I started doing somewhat recently (and is not shown in my YouTube video) is that I’ve started mixing the meringue powder with warm water FIRST and by HAND with a whisk, and THEN adding in the lemon juice.
Here is the step-by-step:
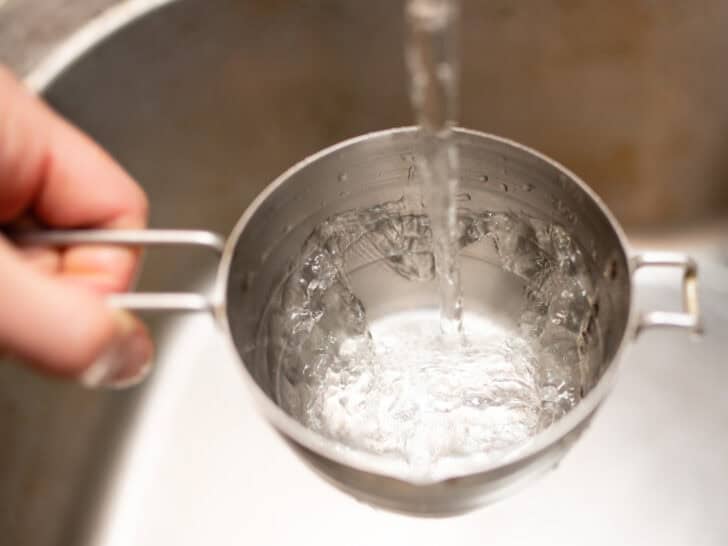
1 – For my recipe, I add 2 TBSP warm water (this replaces 2 TBSP of the lemon juice) to the 45 grams of meringue powder, mixing with a whisk until it has a paste texture (this is when I want to make sure the meringue powder is dissolved).
2 – Then I add in the 1/2 cup lemon juice and whisk by hand until a thick beer foam forms (making sure there are no clumps). I find that using a smaller/stiffer is much easier than using a large/more malleable whisk. When whisking, I like to slowly whisk the paste into the lemon juice to make sure I have incorporated all of the paste into the liquid. Then, I will whisk vigorously to achieve the foam. At this point, you have added 1/2 cup + 2 TBSP of liquid (1/2 lemon juice and 2 TBSP water). If you need to thin further, you’ll add up to 1-2 TBSP of additional lemon juice (that will then come to the total of 1/2 cup + 2-4 TBSP liquid).
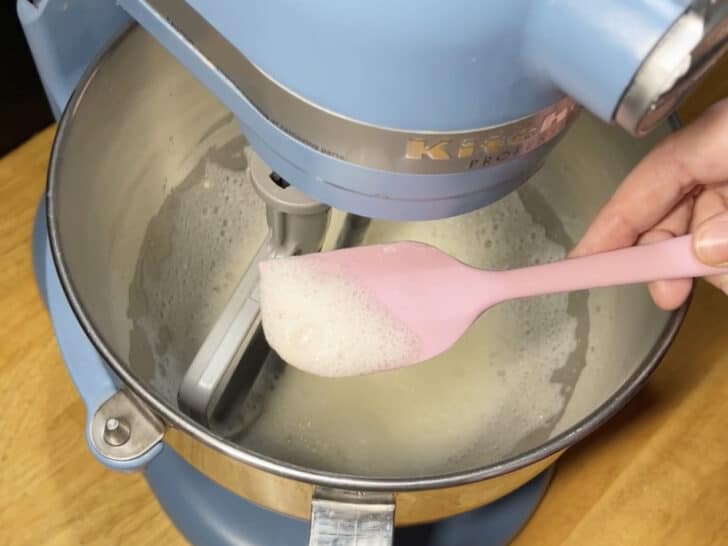
The “beer foam” should look something like this in the bowl:
And then on the whisk:
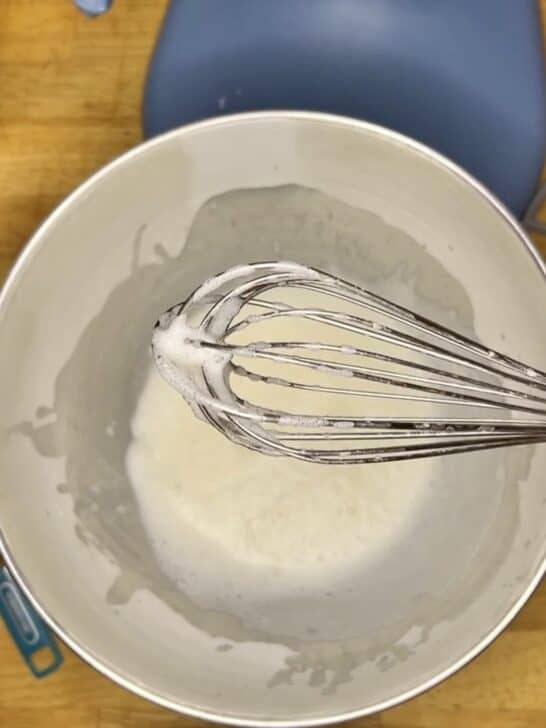
It’s a lot easier than it sounds, I promise!
I will flag that on occasion I haven’t been able to achieve a thick foam; sometimes it’s more of a watery foam no matter how much I whisk it. Not sure why it happens, but I’ve never noticed any issues with the end product (as long as I’m going through the above steps.)
At some point I will re-film my YouTube video, but until then if you read this then you’re in the know on my latest secret 😉
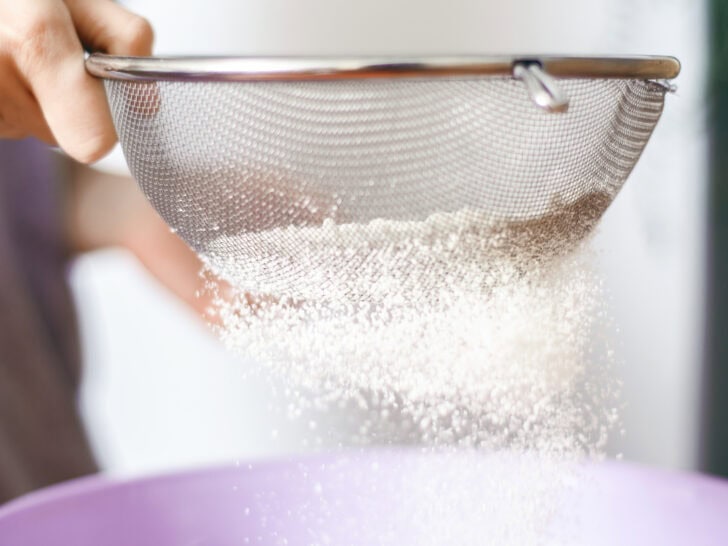
If you’re mixing the meringue powder first and still getting lumps, sift your powdered sugar
I personally have never sifted my powdered sugar, but if you’re consistently finding that your source turns out lumpy than it might be worth it for you!
Sometimes you’ll find that your icing tip gets clogged with a lump. This can either be powdered sugar or meringue powder (that’s why we whip the meringue powder first to make sure it’s fully dissolved).
Always start with the lowest amount of liquid asked for in the recipe
Any good royal icing recipe has a range of liquid (mine is 1/2 cup + 2-4 TBSP). That is because royal icing is heavily affected by the environment that you’re working in.
If the room is really cold/dry, you’ll need more liquid to achieve the same consistency. If the room is really hot/humid, you’ll need less liquid to achieve the same consistency.
This can change day by day even in the same room. And remember: even if you live in a hot/humid environment, if you’re cranking the AC in your kitchen then it’s actually going to be a cooler/drier environment.
It’s always best to start with the lowest amount as it’s easier to thin icing that to try to thicken it if you’ve gone too far.

Use a timer when mixing
Over mixing your royal icing can COMPLETELY ruin it. The worst part? You might not even know this until it has started to dry AFTER you have decorated your cookies.
It’s so easy to lose track of time, so I highly recommend actually using a timer when mixing your icing to know exactly how long you’ve been mixing for.
Nowadays I don’t need to do this, but there have been a handful of times where I’ve been distracted and had no idea how long it had been mixing for! This is where it’s a good idea to also put a dab of icing on a plate after mixing so that you can see pretty quickly if the icing is drying correctly.
Included in the recipe card below are all of my suggested timings when mixing the icing. I’m serious: get out that timer!
Use whichever recipe your heart desires!
Every cookier has their favorite recipe that usually evolves around the flavor (vanilla, lemon, almond, etc), type of egg product used (meringue powder, powdered egg whites, egg whites, vegan aquafaba) and whether it is traditional or “soft bite” (includes corn syrup). And once a cookier picks one, they tend to be loyal and just use that one!
Asking a cookier to use a different royal icing recipe or even advice on a different recipe is kind of like asking an oil painter to try out acrylic paints instead. Yes, it’s the same general concept of painting, but there are different things to keep in mind and ways to approach painting for oil vs acrylic paint. Just because someone is an expert on oil doesn’t mean they can give you advice on acrylics 😉
My favorite recipe includes lemon juice, meringue powder and no corn syrup, so that’s what I teach on! I have some experience with using vanilla extract in my recipe, but other than that I’m not able to give advice on other types of recipes.
If you don’t like my recipe and want to use something else, by all means I encourage you to do so! My general tips and tricks for royal icing and decorating can still be useful with a different recipe 🙂
Give yourself some grace
Royal icing is a very challenging medium to work with and I promise you: you will fail many, many times before you get it right!
In the first few years of working with royal icing there were many late nights and many tears (there was even some blood!)
My biggest piece of advice to lessen the stress is to:
1) always give yourself more time than you think you need;
2) break the tasks up into multiple days; and
3) keep a notebook with notes from every time you decorate (so next time you know exactly what went well/what you need to work on).
Royal Icing with Meringue Powder: General FAQs
Please note: these FAQs are just about the recipe and preparation of royal icing. More in-depth questions and topics about application and consistencies are covered in additional posts (scroll to the bottom of the page for additional topics, etc).
Why would I choose royal icing over say a glaze or buttercream?
While I will not deny that a glaze or buttercream is yummier to eat, you just can’t do as much with a glaze or buttercream in terms of designs.
Now before anyone comes at me you CAN do a lot more than meets with the eye with glaze (you can actually pipe with it!) and buttercream (you can use a tool to smooth it out to give a nice flat surface), but there’s no denying that the flexibility and depth of consistencies that you can achieve with royal icing makes it the most versatile decorating medium.
Does royal icing make your cookies soft?
From my personal experience, my icing does make my cookies soft. But I’m told that’s because of the lemon juice in my royal icing recipe.
Apparently, if you use a vanilla recipe it shouldn’t make your cookies softer (although I have no personal experience to confirm that).
How much icing do I need to decorate my cookies?
This recipe makes about 35-37 ounces of icing. A standard 3.5″ cookie typically requires 1-1.25 ounces icing/cookie. Of course this depends on the design! I usually like to budget 1 ounce for flood + .25-.5 ounce for the top decoration (now this is usually overestimating but it’s definitely my worst fear to run out of icing). So this recipe makes enough icing for 24 (2 dozen) cookies.
***Coming soon: more detailed instructions on how much icing you need to decorate!
Royal Icing with Meringue Powder: Recipe FAQS
Please note: these FAQs are just about the recipe and preparation of royal icing. More in-depth questions and topics about application and consistencies are covered in additional posts (scroll to the bottom of the page for additional topics, etc).
Can I double your icing recipe?
Yes, absolutely! In fact, 9 times out of 10 I make a double recipe. The only reason I give measurements for a single recipe is because most people only need a single recipe at a time 😉
Just make sure you have a large enough bowl! A 5 quart KitchenAid mixer is just large enough for a double batch of my icing.
Can I use fresh lemon juice instead of bottled lemon juice?
You MUST use only bottled lemon juice! I’ve heard many stories gone wrong of attempting to use fresh lemon juice. It’s something about the acidity level in bottled being more consistent/predictable than fresh lemon juice.
I usually use the ReaLEMON brand, however I might have purchased the grocery store brand before. I don’t think it really matters as long as it’s bottled.
What’s the recipe for each consistency?
There isn’t one! Many people ask me for my flood recipe and my piping consistency recipe, but the thing is there is only *one* recipe.
In short, you make the base recipe to a stiff consistency (I recommend either a stiff peak piping consistency or a medium peak piping consistency) in the mixer. Then, you color the icing and then thin the recipe by hand with water to the desired consistencies.
Every good royal icing recipe should give you a range of liquid in the base recipe: that’s because royal icing is incredibly sensitive to your environment.
If it’s very hot/humid there is more moisture in the air and you’ll need less liquid in your icing. On the flip side, if it’s very cold/dry there is less moisture in the air and you’ll need to add more liquid to your icing. This can change day to day in the same working space!
If you’d like more information on consistencies, check out this blog post.
Do I have to use meringue powder/an egg product? Can I make royal icing without eggs?
Yes, it can be made without an egg product! But please note that royal icing was originally made with an egg product and the egg plays a critical role in the science of how royal icing behaves. So, no, you can’t just remove the egg product from the recipe and expect it to do the same things 😉
Vegan/egg-free royal icing recipe:
I’ve never personally made an egg-free royal icing, but I know the gist is that you use aquafaba from a can of beans. Check out this page for a recommend recipe you can purchase.
Royal icing with (powdered) egg whites instead of meringue powder:
Make the royal icing WITHOUT meringue powder: for many it can be challenging to find meringue powder and/or it’s not in budget. You CAN make royal icing with fresh eggs or liquid egg whites (that’s how the original royal icing was made). I have personally never made it with anything other than meringue powder, but if you do try I’d recommend checking out resources from Haniela’s or Preppy Kitchen (both reputable bloggers).
- Powdered egg whites: I’m fairly certain you can use powdered egg whites in a 1:1 substitution with meringue powder, however I’ve never tried it myself.
- Please note: if you use egg whites, do NOT follow my storage instructions as meringue powder makes the icing fairly shelf stable. Otherwise the icing is NOT shelf stable!
What can I flavor royal icing with?
Just about anything! As long as it is oil/fat-free (fat does NOT play well with royal icing). The most common flavorings are: vanilla extract, almond extract, butter emulsion and lemon juice (what I use).
What If I Do Not Like the Strong Lemon Flavor?
First off, I’m obviously biased and would suggest giving the lemon recipe a try! Just about everyone that doesn’t think they’re going to like my lemon icing ends up loving it! A great first compromise is to try the first suggestion…
1. Use less lemon juice: Play around with subbing water 1:1 for the lemon juice. Start with 1/2 water and 1/2 lemon juice and see what you like!
2. Use water and extract instead (no lemon juice): You can sub the lemon juice with water and add 1 TBSP of vanilla extract. [You can use any oil-free extract or emulsion.] Your NEW liquids for the recipe are: 1 TBSP of extract plus 1/2 cup plus 1-3 TBSP water. If going this route I recommend adding just a pinch of salt to the recipe.
*IF YOU ARE GOING TO MAKE A VANILLA/NON-LEMON RECIPE:
Make sure to wipe down all of your tools etc with vinegar or lemon juice before making your icing. Royal icing does not mix well with fats (oils, butters, etc.) and if any fats are introduced to a vanilla recipe during mixing they can ruin the icing so that it does not dry correctly. This is not a concern with my lemon juice recipe since the acidity of the lemon juice seems to counteract any fat introduction (at least I’ve never had an issue and I never wipe down my equipment before use).
Is it possible to actually make royal icing taste good?
Definitely!!! I personally don’t like the taste of vanilla royal icing, which is why I flavor mine with lemon juice. If you’re going to extract route (vanilla, almond, etc.) I always recommend adding a pinch of salt to bring out the flavor.
If you don’t like the harder texture, then I recommend checking out the frankenfrosting options I mentioned above. Since I don’t have a recipe you can reference, check out this page for Borderland’s Bakery’s recipe/
What if I live in a high-altitude climate? Do I need to change the recipe at all?
I personally don’t live in a high-altitude climate and I don’t have any personal experience decorating in one, so I did consult a cookie friend who does! She mentioned that if the climate is quite dry, the icing will just dry/crust a lot faster so you don’t need a dehydrator to help it dry faster. Yay!
Royal Icing with Meringue Powder: Preparation FAQs
*Please note: these FAQs are just about the recipe and preparation of royal icing. More in-depth questions and topics about application, troubleshooting and consistencies are covered in additional posts (scroll to the bottom of the page for additional topics, etc).
Do I have to wipe down my equipment with lemon juice/vinegar?
If you are not using my lemon juice recipe, then YES! This is a precautionary measure. And believe me, the one time you don’t is going to be the time it ruins your icing 🙁
Royal icing does not interact well with fat, and unless you have mixing equipment that you ONLY use for your royal icing, chances are there’s some potential leftover fats from other baked goods you’ve made on your equipment. That’s why it’s best to wipe everything down (mixer, bowl, paddle, spatula, etc) with lemon juice or vinegar to neutralize the fat.
Can I use a hand mixer instead of a stand mixer?
I’ve personally always used a stand mixer, but I know people who have used a hand mixer! Use whichever one you have 🙂 That said, I’m not able to give any specific advice on hand mixers since I’ve never used one for icing.
Wondering which mixer I have? I have the KitchenAid Professional Series 600 6 qt bowl lift – I like the larger bowl as it fits a double batch of dough easily, but the most common size is a 5 qt.
Do I have to mix consistencies by hand, or can I use a hand/stand mixer for the whole thing?
Yes you do!! At least I wholeheartedly believe so 🙂 Royal icing can very easily be over mixed (which ruins the icing). It’s very easy to over mix with a machine, whereas it’s almost impossible to over mix by hand (unless you’re super human!)
Given that, I *always* recommend mixing the icing to the initial thickness in the mixer, and then transferring to bowls to color and thin consistencies with a spatula/spoon. Every time I’ve tried to mix my consistency in the mixer, even if I don’t over mix it I find that it incorporates a lot more air bubbles.
Now the one exception to this: if you are making large quantities for say a class (and I mean LARGE), then it might be worth testing out a hand mixer that goes to a VERY LOW setting. I’ve personally just about ruined my hands/arms trying to mix icing for classes, so it’s at least worth a shot!
When do you color the icing?
When I first started working with royal icing I thought you had to thin the icing first THEN color it. So I spent over an hour trying to color match my blue piping and flood consistencies. WHAT A DISASTER. So I’m here to save you the same headache to tell you: color the icing first, THEN thin it to your desired consistency!
Step 1: Mix icing in the mixer
Step 2: Transfer to bowls by color (i.e. if you need 2 ounces blue soft peak piping consistency and 5 ounces thin flood consistency, then your blue bowl has 7 ounces)
Step 3: Color icing with a spatula/spoon
Step 4: Thin to desired consistency (with a spatula/spoon) and bag as you go (i.e. first thin to a soft peak, then bag 2 ounces, then thin the remaining to a thin a flood, then bag the remaining 5 ounces)
How do you color icing with gel colors vs. powdered colors?
Gel colors are super easy to work with because you can add them straight to the icing. Powdered colors (like The Sugar Art Master Elites), however, have to be activated with liquid BEFORE being added to the icing.
Check out these videos for some real time action of coloring icing with gel vs powdered colors:
- How to color icing with gel coloring (beginning of video)
- How to color icing with powdered coloring/Master Elites (beginning of video)
How do you recommend coloring icing/storing it as you’re working with it?
I always start my icing prep the day/night before, so I need air tight containers to store my icing.
Side bar: up until a couple years ago I would just use whatever bowls I had, cover with a paper towel or dish towel, and then cover with a plate. This gave me a good enough seal to leave them out on the counter overnight!
- My favorite way to store icing is in these Pyrex bowls – they comes with lids!
- 4 cup bowls are best for about 1 recipe of icing (what I used for this set)
- 7 cup bowls are better for large quantities (2-4 recipes of icing)
Is it necessary to color white icing?
Nope! I didn’t color my white icing for years. Granted, it was an ever-so-slightly off-white (not a pure white), but it got the job done!
Why would you want to color your white icing? Chances are you’re using a flavoring with a color to it (like vanilla extract or lemon juice) and when mixed with white powdered sugar, it will give the icing a tint. You’ll notice though that as the icing mixes in the bowl it will actually get whiter than where you started (something about the science behind how the light reflects…)
You could avoid this by flavoring your icing with clear vanilla, but obviously I’m a lemon juice diehard so that’s not a solution for me 😉
If you do choose to color your white icing, you have two options:
- Use a white gel coloring like Americolor gel in Bright White OR Chefmaster gel in White OR The Sugar Art Master Elite in White
- Use the TINIEST bit of purple gel coloring (use a toothpick!) – purple is the option side of the color wheel as yellow, so it will basically cancel out any yellowish tint. I’ve personally never done this because I’m terrified of ruining an entire batch of icing, but plenty of people have had success with this!
What happens if my icing crusts in the bowl?
Have no fear, you can save it! Well, as long as you haven’t left it out crusting/drying for hours…
Royal icing crusts as it’s exposed to air, so it’s important to make sure you cover all bowls as you’re mixing colors/consistencies. That said, I’ve definitely been guilty of forgetting to cover the mixer bowl, etc.
Whatever you do, DO NOT MIX THE CRUSTY BITS INTO YOUR ICING. Those crusty bits will not melt/incorporate into the fluffy icing. Instead, they’ll stay as they are and clog up your piping tip.
If that’s you, there’s an easy solution: dampen a paper towel or dish towel (DAMP, not wet) and place on top of the bowl. Then cover that with the top of the bowl or a plate. Allow to sit for about 15-30 minutes (sometimes up to one hour). This should melt the crusty bits away!
The only downside to this is that you’re adding moisture to your icing (that’s how the crusty bits melt) so it will thin your icing a bit. If you’ve already thinned your icing to the perfect consistency this could be a massive bummer, but it’s better than ruining an entire bowl of icing!
How do you recommend bagging icing?
Use a cup! Makes your life so much easier 🙂 This video at time stamp 3:04 for tips on bagging icing.
How far in advance can I make royal icing?
Anywhere from a few days to a month or two! Just remember if the icing is stored in the fridge or freezer, it needs time to defrost/come to room temperature before you can use it! Even straight out of the fridge it will have a deceptively thicker consistency than what it really is.
ALWAYS REMEMBER: do NOT thin your icing to its desired consistency until a couple hours before actually using. In the examples listed below, 9 times out of 10 I’m just storing a fresh batch of unthinned icing. I might choose to color the icing in advance (like the few days option to give it plenty of time to develop).
A few days: since I’m using meringue powder in my recipe, I will store my icing in an airtight container on the counter for up to a few days.
One week: if I’m making my icing one week in advance, I will usually just store in the fridge (although it can also be stored in the freezer).
More than one week/a couple months: if I’m making icing well in advance, I will store my icing in the freezer.
Want to try cookie decorating?
Try out one of my online cookie decorating classes!
More topics to cover in depth about royal icing:
- What Is Royal Icing: A Beginner’s Guide
- How to store royal icing (more detailed instructions)
- Royal icing consistencies
- Troubleshooting Royal Icing: Common Problems While Cookie Decorating
- How much icing per cookie – coming soon!
- All of my favorite cookie decorating supplies
Recipe Card
Royal Icing Recipe with Meringue Powder

My signature royal icing recipe with meringue powder. It's sure to please the tastebuds!
Ingredients
Instructions
1. Using a paddle attachment (or whisk if you prefer), beat meringue powder (45 grams) and 1/2 cup + 2 TBSP lemon juice on medium high (speed 6) until a beer-like foam forms (approx. 1-2 minutes). Scrape down the sides at least once. More detailed breakdown for the 1-2 minutes:
- Beat on medium (speed 4) for 30 seconds
- Scrape the bowl
- Beat on medium high (speed 6) for 1 minute
- At this point you have reached 1.5 minutes of beating. It is OK to beat for longer if needed! Almost impossible to over mix at this stage.
2. Add in the powdered sugar and mix on lowest speed until incorporated. Scrape down the sides.
3. Mix icing on medium speed for 2-4 minutes until a fluffy icing forms at either a stiff or medium peak, depending on yours needs (depending on your environment and desired consistency, you may need to add some or all of the additional 2 TBSP lemon juice). More detailed breakdown of the 2-4 minutes:
- Stir on low for 30 seconds
- Beat on medium (speed 4) for 30 seconds
- Scrape the bowl
- Beat on medium (speed 4) for 1 minute
- Scrape the bowl - if you need more liquid, now is the best time to add any or all of the remaining 2 TBSP of lemon juice
- Beat on medium (speed 4) for 30 seconds (either for one final spin or to incorporate the additional liquid)
- At this point you have reached 2.5 minutes of mixing. If you added additional liquid, you may want to beat for another 30 seconds to more fully incorporate. If you need to continue to adjust liquid, you still have more time to beat the icing before it is over mixed. Icing should either be at a stiff peak piping consistency or medium peak piping consistency (if it's much stiffer than a fluffy stick peak, then add more water).
***All indicated speeds are for a KitchenAid stand mixer.
Notes
Be careful not to over mix, as that can cause air bubbles or ruin the icing (it will crumble when dry). Watch the mixer carefully in this last stage as the mixing time can vary greatly. I always recommend setting a timer once you have added all of the ingredients to the bowl to avoid over-mixing (once you reach 5 minutes+ you risk over-mixing).
This recipe makes about 35-37 ounces of icing. A standard 3.5" cookie typically requires 1-1.25 ounces icing/cookie. Of course this depends on the design! I like to budget 1.5 ounces icing/cookie just to be safe. So this recipe makes enough icing for 24 (2 dozen) cookies.
**Additional meringue powder options:
Michelle
Saturday 14th of February 2026
I followed your cookie and royal icing recipe today for my first time trying any of this! It was so fun. I appreciate all of the details and your youtube videos as well. I still have a ton to learn, but my cookies turned out pretty well for a first attempt! Thank you for taking the time to teach us your secrets, tips and tricks!
thegracefulbaker
Saturday 28th of March 2026
so glad you enjoyed the recipe :)
Ashley
Friday 19th of December 2025
I have made your icing and cookies once and they turned out so good! I really liked the lemon flavor, but my wife is not a super fan. I was going to try making the recipe again with almond extract, but you make it super clear in your blog to not use any oils or fats. I can’t seem to find an almond extract that doesn’t have “bitter almond oil” as one of the ingredients. Is that going to ruin the frosting if I use that? Do you have an almond extract that you recommend?
thegracefulbaker
Sunday 21st of December 2025
hi!!! I think that should be fine :)
Carla
Thursday 4th of December 2025
OMG, there are so many courses to choose from! Amazing! Out of curiosity.... would you consider doing up a RI set of Chanukah Symbols and items? I'd love to be able to do some of those for the company I work for! Thank you for the amazing videos, you truly are very gifted and blessed! Carla
thegracefulbaker
Saturday 6th of December 2025
hi!! so I don't have a Hanukkah class, but I do have this content set I made: https://thegracefulbaker.com/hanukkah-cookies/
Gina
Thursday 27th of November 2025
Excited to decorate with my kiddo! Have you tried adding corn syrup to this recipe?
thegracefulbaker
Wednesday 3rd of December 2025
I have not! but I know that a lot of people try that :)
Larizza Sauceda
Thursday 13th of November 2025
Can I switch out the lemon juice for water? P.s, I love watching your videos you are one of my favorite female bakers.
thegracefulbaker
Thursday 20th of November 2025
you can! but you'll still want to flavor the icing with something.
1. Use less lemon juice: Play around with subbing water 1:1 for the lemon juice. Start with 1/2 water and 1/2 lemon juice and see what you like!
2. Use water and extract instead (no lemon juice): You can sub the lemon juice with water and add 1 TBSP of vanilla extract. [You can use any oil-free extract or emulsion.] Your NEW liquids for the recipe are: 1 TBSP of extract plus 1/2 cup plus 1-3 TBSP water. If going this route I recommend adding just a pinch of salt to the recipe.