Let’s talk edible moss (or grass) for cookies. This stuff is a game changer when you want to add texture, color, and just a little extra oomph to your cookies. Whether you’re decorating garden-themed cookies, Easter sets, or woodland vibes, edible moss brings the look together—and bonus—it’s actually super easy to make.
I always prep my edible moss the night before I decorate. That way, the color has time to develop and the crumbs get a chance to dry out. Trust me, it makes the process smoother the next day.
*DISCLOSURE: This post contains affiliate links which means that, at no additional cost to you, I may earn a small commission if you make a purchase from one of my links. I greatly appreciate your support!
Here’s how to make your own edible moss:
1. Choose your base
You can use either graham crackers or leftover sugar cookies. I always go with graham crackers—they’ve got the right texture and a neutral flavor that won’t mess with your cookie vibes.
2. Crush the crumbs
Pop your crackers (or cookies) into a food processor or blender and pulse until you get a fine crumb. No food processor? Throw them in a Ziploc bag and crush them with a rolling pin. Aim for a fine texture—too chunky and they won’t stick well, and you’ll have a harder time decorating on top.
3. Add crumbs to a large Ziploc bag
Transfer all your crushed crumbs to a gallon-sized bag so you’ve got room to mix.
4. Add gel food coloring
Start with just a few drops. I use a combo of Royal Blue and Lemon Yellow to reach my desired green (sometimes I want more yellow; sometimes I want more blue). You can always add more, so go slow.
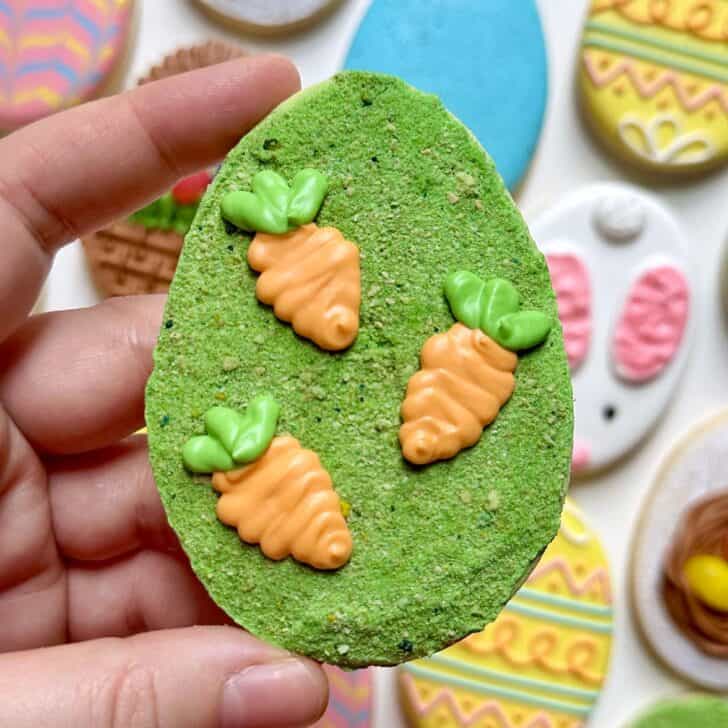
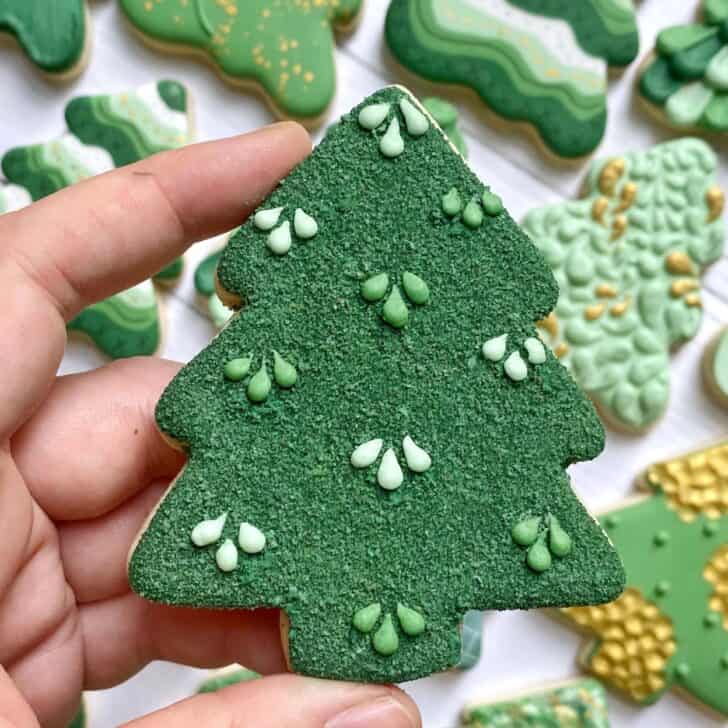
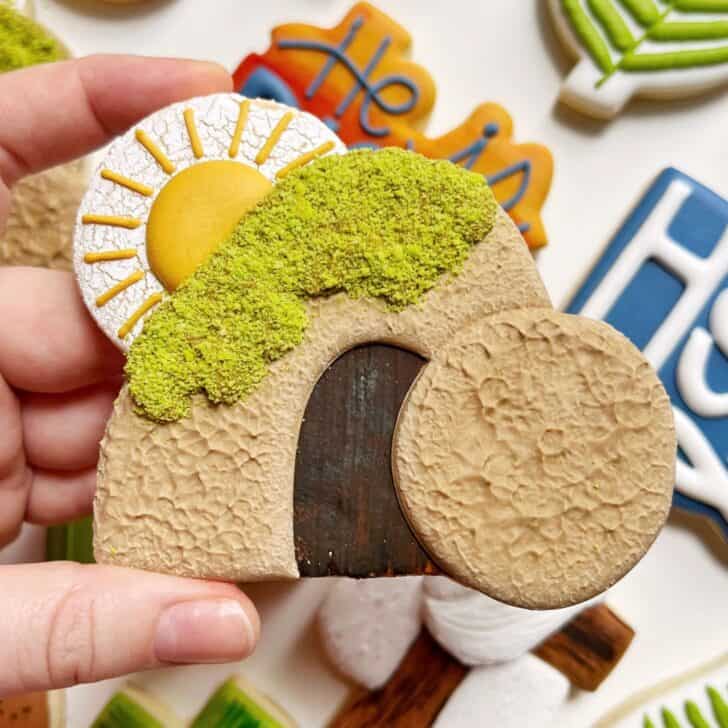
The grass on the carrots has an even balance of blue and yellow. The tree is heavy on the blue, whereas the moss on the tomb is heavy on the yellow. You can always use a Leaf Green straight out of the bottle, but I prefer to be able to customize!
5. Add a splash of clear alcohol or extract
Gel food coloring doesn’t mix well on its own. Add a splash of clear alcohol (like vodka or Everclear) to help the color spread evenly. If you don’t want to use alcohol, a clear extract like vanilla, almond, or lemon will also work. Again—start small!
6. Massage to combine
Seal the bag and massage it all together until the color is evenly distributed. Keep adding more color or alcohol/extract until you get the shade you want.
7. Let it dry
This step is only really necessary if you were a little overzealous with the liquid that you used. Often, you can use the moss right after you make it.
If you feel it needs time to dry/air out, either just leave the container top open or lay the crumbs out on a parchment-lined baking sheet or plate and let them dry completely—overnight is ideal. The color will deepen as it sits!
And that’s it! Once dry, your edible moss is ready to use. Sprinkle it over royal icing, decorate your cookie bases, or create little mossy landscapes. It adds so much texture and visual interest without a lot of effort. Win-win!
If you’d prefer video instruction, check out this great video by Little Cookie Co.
Cookie Sets with Edible Moss
Easter Eggs (the carrots with moss/grass)
Meaning of Easter (the tomb with moss)

Tree Shape Series (Christmas tree with moss)
Want to try cookie decorating?
Try out one of my online cookie decorating classes!
Other posts you might be interested in:
- What Is Royal Icing: A Beginner’s Guide
- My Royal Icing Recipe
- My Cookie Recipe
- Royal Icing Consistencies
- How to store royal icing (more detailed instructions)
- Troubleshooting Royal Icing: Common Problems While Cookie Decorating
- How much icing per cookie
- All of my favorite cookie decorating supplies
- Left-Handed Cookie Decorating
- Cookie Decorating Practice Sheets